Hope everyone is safe and healthy! I’m early with my post this month. My family will be visiting from Ohio later this month, so I have to get everything I need to accomplish done early. Today I have a quick video on how to make an envelope for the card we made last month. I felt I left you a little high and dry last time as we made an odd size card and no way to mail it! You can use this technique for any size card. I hope it is informative and helpful.
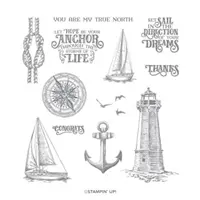
I’m back with a video tutorial this month after taking last month off. This video is very short and sweet, but I think you are going to like what you see. This month we are using the Sailing Home stamp set and we are making coasters for you to use while you are sitting out on your patio or deck, whatever you may call it, or as you lounge along side your backyard pool. Back yard pools are not a thing here in Colorado. We are more of a hot tub state, so in my case I would sit under the awning on my patio, next to the hot tub having a cool drink while I look up at the stars on a warm summer night and dream about being near the beach.
Being near the beach again is not going to be in the near future since my daughter moved back to Colorado at the end of February. I do have a trip planned for a visit back to Virginia Beach for the beginning of August, but I don’t think we are going to make it this year. I believe the resorts in Virginia are still closed and even if they weren’t I’m not sure I want to take that risk with the virus still around. But I have a pretty good imagination and with a glass of wine after dinner, I’ll sit by my hot tub this summer and dream about the beach as I use my summer beach coasters.
Some of the things you will need are sandstone coasters with cork backing, painter’s tape and permanent waterproof ink. The remainder of the items are listed at the bottom of this post. I hope you enjoy the video.
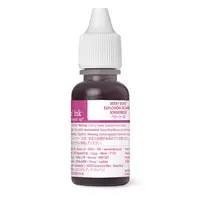
It has been quite a while since I was last here. Sorry about that. I’ve been really busy doing life! 🙂 But today I have a video for you on a pretty simple watercolor technique that anybody should be able to do and I mean anybody because if I can pull it off…anyone can. Actually we did this technique at my April card club on Saturday and NO ONE’S turned out bad! Each piece was unique in its own way and ALL were very beautiful! The ink colors I used in the watercolor are retiring along with the Berry Burst and Powder Pink Paper. The watercolor paper is retiring as well, but Stampin’ Up! is not getting rid of it entirely. They are bringing out another version. If you still have questions after you watch the video, let me know.
A few items you will need when watercoloring that are not listed in any of the supply lists are a clip board, blue painters tape, paper towel, and small trays to hold your ink. I used the tops to embellishment container. I always save the container when I’ve used up an embellishment. They have come in handy for a multitude of uses.
I am also sharing photos of the other three cards we made at club along with their supply lists. If you have questions on those you can email me about them as well.
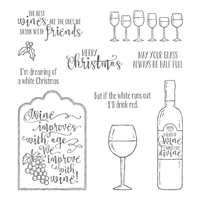
I got the inspiration for this card from the Annual Catalog. Please note the Berry Burst card stock is about to retire along with the Half Full stamp set. So, if you want either one of these you need to order soon (before June 1).
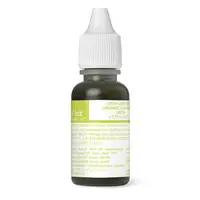
Please note the Lemon Lime Twist card stock and ink along with the stamp set Amazing Life are on the soon to be retiring list, so if you are interested in either you need to order soon (before June 1). #simplestamping
I have a new video for you this month along with a new look on my blog. Hope you like both.
The video is on a piece of wall art I CASED and created using the Half Full Stamp Set and the STAMPARATUS! Wooo Hooo! I finally got mine, and when I did I realized it would be perfect to use on this project. The Half Full Stamp Set is a carry over from last year’s Holiday Catalog. The video is a little long, but it is definitely worth the time. I hope you enjoy making this project as much as I did.
Two items that are not listed in the supply list at the end of this post is a 5 x 7 shadow box frame in black and some washi tape to tack down the edges of your card stock and your letters dies. Now on the frame, as I show you in the video, you do not need a shadow box frame. You can use a less expensive $3.00 5 x 7 photo frame if you choose. Your end product will be just as nice.
Just a reminder that SALE-A-BRATON ends on the last day of this month so if there is anything you have been wanting, but you have been putting of purchasing, now is the time.
Sorry about the glare and shadows in the following photos.


You must be logged in to post a comment.