I know… I know! …it has been far too long since my last blog entry or since making a video or stamping! I don’t know what I’ve been doing since May, the date of my last REAL post. I do know that during the months of September and October we did a great deal of traveling. My husband and I spent the month of September in Florence, Italy. We talked about going to Italy for an extended stay for quite few years and finally decided to make this year be the year we did it. My 88-year-old mother made the trip with us during the first week of September. She was born in Italy in Villa S’ Angelo, L’Aquila well…88 years ago. (DUH! 🙂 She immigrated to the United States when she was 15.
There is a story there. She was 15 when she first met her father face to face. My grandfather came to the United States years before the rest of his family, around 1916 at the age of 16 to work. On one trip back to Italy, he married my grandmother, turned right around, and came back to the U. S. to continue working. He sent money back to my grandmother and on occasion went back to Italy for a visit. Nine months after returning to the states from a visit, another one of his children was born! My mom is the youngest of three. During World War II, my mother, grandmother, and uncles were stuck in Italy. Many Italian Americans were treated as poorly as Japanese-Americans were during the war. Some were even sent to camps here in the states; even some who were naturalized citizens. Italians, even though they served in our military and fought in World War II for the United States were viewed as a threat to national security during the war; especially if they spoke Italian. I’ve heard many stories from my mother about how poor they were while in Italy during the war; how they went without food because the Nazi’s took everything everyone had, and how often the money my grandfather sent back to them never made it through. After the war, my grandfather was finally able to send for his family and they immigrated to the United States. Therefore, at the age of 15, she finally met her father face-to-face for the first time on U. S. soil.
However, I digress! We took my mother back to Italy with us in September. She had been back several times before and on many of those occasions, I was fortunate enough to be able to go with her. Her first time back was in 1976 thirty-five years after arriving here. However, this last time we went she says will be her last time since she is 88. I told her to never say never, because we do not know what the future holds.
My mother, husband, and I spent our first week in Rome with a friend. The friend is from the same village as my mother, but she is only a few years older than I am. Her parents purchased the home that belonged to my grandparents after everyone had finally made it to the states. She and her late parents and her brother and sisters have always treated us as if we are members of their family. After the first week, my husband and I traveled by high-speed train to Florence and left my mother with her friends in hometown.
We rented an apartment on the website vrbo.com in the center of the city. There was a farmer’s market just around the corner from where it was situated. We visited it on almost a daily basis as we usually had breakfast and dinner in our apartment. We saw and did pretty much everything you can see and do in Florence. And there is a lot to see and do! We also took a one-day tour by bus to Pisa, Sienna, and San Gimingnano. Another day we took a bus tour of Cinque Terre. During our second week in Florence, we took another high-speed train to Milan so we could tour Lake Como. We spent two nights there after which we returned to Florence. During our last week, we did a wine tasting tour in Tuscany and we took a cooking class and learned how to make homemade pasta. I grew up watching my grandmother and mother make pasta, but I never learned how to do it. It was truly the trip of a lifetime! At the end of our fourth week in Florence (our fifth week in Italy) we took another high-speed train back to Rome and the next day flew back to the United States. We dropped my mother off in Ohio and spent two more days there, finally getting back to our home here in Colorado exactly six weeks after leaving it. It was good to be home!
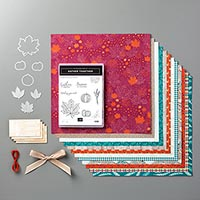
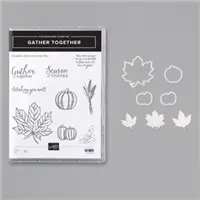
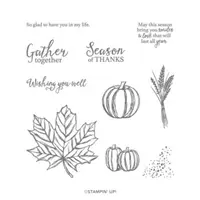
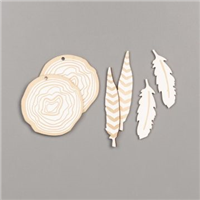
So today I am sharing my version of the framed “Gather Together” piece that you will find on page 46 of the current holiday catalog. I used most everything in the Come To Gather Suite. The one item I did not use are the Tags & Feathers Elements because I usually buy those kinds of things and never end up using the. What I did do instead is stamp a few leaves in Crushed Curry using the retired Vintage Leaves stamp set and I cut them out using the Leaflets Framelits.

The frame I used measures 5-1/4″ x 9-1/2″. It is about 1/2″ wide. It isn’t a shadow box frame. It was originally intended to frame three 2.5″ x 3.5″ photos. I removed the mat that came with the frame and threw it away. I’ll probably regret that one day, but I just can’t hold on to everything. Something I realized once the project was finished is that a smaller frame, perhaps a 4″ x 6″, might be better because there would be less blank space on the background. Or I could possibly stamp a few pumpkins in the background .
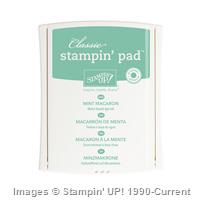
All of the colors I used are the recommended colors that coordinate with the Come To Gather Designer Series Paper except for the Crushed Curry. It is not a recommended coordinating color but it does fall into the same color palate.
Hope you enjoyed reading about and seeing some of what I’ve been up to lately. I don’t know where the summer went, but it sure did go by quickly and here I am getting ready to get my house ready for Christmas!
If you have any questions about this project, feel free to message me! Until next time…
Happy Stamping!


You must be logged in to post a comment.