Party Panda Valentine Treat Box

Hello Stampers!

I’ve been absent and I know it.  I’ve been busy doing tons of other things and not stamping like I should be, but I have managed to create another video tutorial for you.

“What has been keeping me busy?” you ask.  Well…I’ve been busy crocheting these messy bun hats/beanies that I’ve decided to sell in my online Etsy store.  I had a practice run with selling them last weekend at a local indoor garage sale and I did quite well, if I say so myself.  They are the latest rage for people with long hair.  And a few of us with short hair have been known to sport one on occasion as well.  It is easy for me to convert them to a regular beanie without the bun opening on the top and I’ve done that with a few.  My online Etsy store is called FancyforStampinEtc meaning I don’t only fancy stamping, but other crafts as well.  It isn’t totally up and running yet, but it is my goal to have it complete by Tuesday of this week.

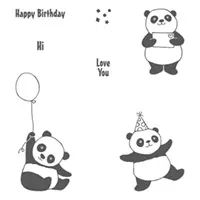
But enough of beanies, and on to my video tutorial of my Party Panda Valentine Treat Box.  It has been awhile since I last created a video and it is amazing how out-of-practice I’ve become.  I made quite a few mistakes and one you might notice is…Well I’ll see if you can guess.  In spite of the error, the tutorial is still a good explanation of how to make this cute Valentine for your sweetie. So, I won’t be real hard on myself.  🙂

The Party Panda stamp set is a Sale-a-bration item and is yours FREE with any $50.00 purchase in my online store.  Just click on the link to shop on the right side of this page or on the link at the bottom of this post.

Hope you enjoy the video and you have fun making one of these cute little treat boxes for your sweetheart this Valentine’s Day.

Until next time…

Happy Stampin’


Price: $110.00


Envelope Mini Album

Hello Stampers!

No, I have not fallen off the face of the Earth; I am still alive and well!  The last few months have been pretty busy as you can imagine.  My daughter gave birth three days after my last blog entry and much of my time has been spent admiring her and her partner’s handiwork.  Baby Stella is beautiful if you ask me!  I am totally in love with her. 🙂  In October my mom, sister and brother-in-law visited to see the baby and just last week I was in Salt Lake City for OnStage 2017.  So the last few weeks have been busy.

If you will indulge me for a moment, I want to share a few pictures of the newest edition to my family.  Thank you in advance for humoring me.  I know all Grandmas think their grandchildren are beautiful and I promise I will not make this a habit.  🙂  These are from earlier this month.

Now on to the real reason why we are here.

I created this mini album awhile ago, but I wanted to make sure I shared it before too much more time passes, because I think something like this would make a really good Christmas gift to someone you love…maybe a new Mom or Grandma!  Now you know what I plan on doing with mine.   Both videos run a little long, but I think they are well worth the time.  I don’t go into details on the decoration of each page, but I have included a photo of each at the end of this post with a description of what I used to decorate it.  I hope you like what you see and take the time to make one for yourself.  I think it would be well worth your time.

Enjoy the videos, and if you have any questions about anything related to this project, please email me.


Until next time…

Happy Stamping!


These are the front covers of both albums.

This is the inside of the front cover and the pocket on page 1.

Pages 2 and 3.  On the page 3 on the right I cut a reindeer in gold foil and quartered a foil snowflake for each corner.

Pages 4 and 5.  I made pockets on each page.

Pages 6 and 7.  I used the snowflake dies from the Seasonal Layers Thinlits and the 1/2″ circle punch to make the circles on the right.  The left side is a pocket with a half circle notch cut at the top edge using the 1″ circle punch.  I also cut a foil snowflake in half and glued it over the pocket and cut the center out with the 1″ circle punch.  I used the Winter Wonder and Holly Textured Embossing Folders one each page.

Pages 8 and 9.  A small corner pocket and bands to hold photos/mementos.

Pages 10 and 11.

Page 12 and inside of back cover.


Shop On-line 24/7

http://www.fancyforstampin.stampinup.net


Daisy Delight Gift Bag and Cards

Hello!

As I mention in my first video, it has been way too long!  June and July seemed to fly by.  We left for vacation in June right after the new Annual Catalog went live and July was spent catching up and anticipating the birth of my granddaughter.  My daughter is pregnant due to give birth to baby Stella in September. I can barely contain my excitement!  Yes, I have three other grandchildren through marriage, a 6-year-old and almost 2-year-old grandsons and a 6-year-old grand-daughter.  This one is a little different.  It is MY baby girl having her OWN baby girl and making me a REAL Nonna!   (Italian for Grandma).  I needed to make some shower favors and complete a few crochet projects I had started for her.  That is all done now.  Now we just wait…..:)

As I also mention in the video, I was inspired by July’s Paper Pumpkin to create this gift bag and cards.  I think I call it a box in the videos, but it is really a bag.  For July’s Paper Pumpkin, I created two different sizes of bags; one for the note cards and one for the 5-1/2 x 4-1/4.


So here are the videos.  I hope you enjoy them. Before you watch, you need to know that I mis-called the color of navy card stock in the videos.  I said I used Not Quite Navy (a retired Stampin’ Up! color) when in fact I used Night of Navy.  Sorry.  🙂 If you have any questions, please let me know.


Hope you enjoyed your visit today!  Until next time…

Happy Stamping!


Price: $110.00


Happy Celebrations Card Video & New Catalog Sneak Peak

Hi Stampers!

I have a new video for you today!  I know, it is about time!  To be honest, I’ve been a bit scattered for the last few months.  Don’t know what it is.  I have been trying to get my groove back and nothing seems to work.  In two weeks we will be going on vacation so it probably will only get worse from here.  Sorry.  Please be patient with me.

The video is for a card I created using the Happy Celebrations stamp set, Celebrations Duo Textured Impressions Embossing Folders,  the new In Color Lemon Lime Twist paired with Bermuda Bay, and inspiration from Pintrist.  I love the colors, especially the new one! They all combine with an old technique, emboss resist, to make this funky “Celebrate” card.  I hope you like it as much as I do.  Here’s the card.  I made a similar card for my great-nephew’s First Communion by adding the words “First Communion” to the bottom with Labler Alphabet stamp set.  Not a traditional First Communion card, but I’m sure it was the very small amount of cash inside the child was after more than the card .  🙂  LOL!

And here is the video!

Using the same stamp set and set of embossing folders I created this birthday card as well.

The dotted background circles were made using the Eastern Beauty stamp set that will be available when the new Annual Catalog goes live on June 1st.  Here is the item number for future reference for the Eastern Beauty Set  (143675).  Since the catalog isn’t live yet, the program I use to create the supply list at the end of this post wouldn’t allow me to include it.

I love this set!  And you can get it one of two ways right now.  You can order the Eastern Palace Starter Bundle #147196 for $77.00 which include all the items in the photo below or…

Order the Eastern Palace Premier Bundle #147207 for $103.50 and get everything in the following photo.

Either way, you can get a head start on new In Colors, Designer Series Paper, and embellishments BEFORE the new Annual Catalog goes live on June 1st.  I wouldn’t wait.  I am sure these items will go on the back order list right away.

This last card is a sneak peek at a new Hostess Set called Background Bits and new Designer Series Paper.  The ink colors I used are Crushed Curry and Old Olive.  I can’t wait until all of the new stuff is available on June 1st!  I might have to go back to work!  🙂  Here is a simple version of the card and a stepped up version right after.  Which do you like better?  I prefer the second, but both are equally pretty.

Hope you enjoyed your visit today.  Please let me know if you have any questions about anything here.  Until next time…

Happy Stamping!


Price: $110.00