Dandelion Shadow Box Card (also Blossoms in Bloom)

Hi Stampers!

Hope you are all doing well and staying healthy!  There is nothing new here to report other than the gym has opened back up and I went there four times since last week.  I wonder everyday I set foot in there if I am doing the right thing by going.  I don’t want to catch any of this virus stuff!  They are running at I think less than 1/2 capacity.  We have to make a reservation for any class we want to attend and can only make it up to 48 hours in advance.  We are also only allowed 1 hour per visit per day.

My husband and I went out to eat for the first time since February last Friday.  We went to a restaurant where we could eat outside on purpose.  There was definitely MORE than 6 feet of space between the tables, so I felt very safe.  Each time the waitress came to the table we wore our masks.  Trying to be safe and still enjoy life a little.

I’ve been a stamping fool lately.  There isn’t much else to do other than clean and if you put cleaning and stamping in front of me, stamping will win every time. 🙂


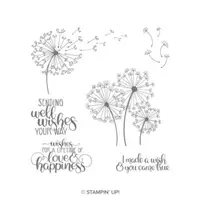
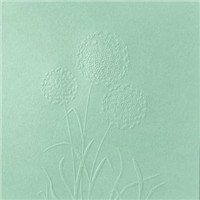
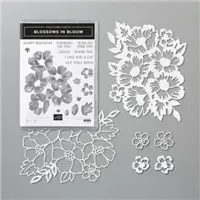
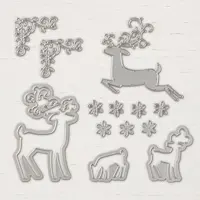
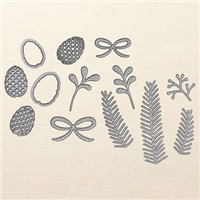
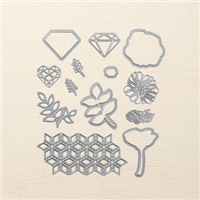
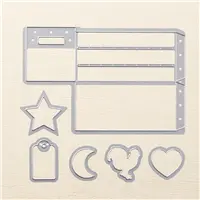
As I mention in the video, I started out wanting to make a shadow box card. My initial thought was to use the Blossoms in Bloom stamp set and Many Layered Blossoms dies, but I ended up creating a shadow box card out of one of my monthly club cards.  For the card I am featuring today,  I used the Sweet Silhouettes Dies, Subtle 3D Embossing Folder and Dandelions 3D Embossing Folder along with a sentiment and image from Dandelion Wishes stamp set. I love dandelions and I think the embossing folder and stamp set go very well together.   I will give you the dimensions of the card stock pieces and colors used for the two initial cards I was going to make.  The video will give you all the information you will need for the Dandelion Shadow Box card.  The first supply list at the end of the post contains all the things you will need to create the Dandelion card.  The second supply list will be preceded by the card stock dimensions for the other two cards.

If you watch the video, you will notice I didn’t decorate the inside front cover of the card.  This is a photo of how I decided to quickly cover up that seam the card base creates.


Do you want to make this card? Just click on the images in the showcase to add the items to your shopping cart or click the button at the bottom of each showcase to add everything into your cart.

Enjoy the video!


This is what you need for the dandelion card.

Dimensions for the Blossoms in Bloom cards are as follows:
  • For card base you need two pieces of the same color card stock that measure 5 1/2″ x 11″, and 5 1/2″ x 4″
  • Inside the card you need two pieces of the same color that measure 5 1/4″ x 3 1/4″
  • Front of the card you need 2 pieces of the same color.  One piece is 2 1/4″ x 5 1/4″ and one piece that measures 4 3/4″ x 3 3/8″
  • Also on the front a piece of Whisper White 2 3/4″ x 4″
This is what you need for the other two cards.

Order Online 24/7

http://www.fancyforstampin.stampinup.net


Christmas Lantern

I’ve been gone for a while and there is no excuse!  I’m not really sure what has been keeping me so busy lately, but I have been.

The peach tree in our back yard provided us with a bumper crop this year.  Compared to last year’s 5-peach harvest, if peaches were dollars we’d have a million.  After giving as many as we could away, eating many fresh ones, and making a cobbler and a pie, we’ve frozen about 23 quarts.  We started making peach jam with them this week.  As I write this, my husband is out back and is now picking a bumper crop of grapes from our grape vines. We again got very few last year.  (He insists on planting these kinds of things.)  He will be spending the day washing, bagging and freezing them until I can get to them for grape jelly at a later date.  I pray to God the apple tree he planted a few years ago never produces fruit! 🙂  We start with strawberries from a small strawberry patch (it continues to grow)  we have in June, cherries from our tree in July, August is peach month, then grapes…I don’t want apples, but…shhhhhhhhh!  Please don’t tell him I said that.  Oh, we can’t forget the tomatoes from the garden that make great pasta sauce!  All kidding aside, there is nothing like the taste of a freshly picked piece of fruit or vegetable.

I’m getting ready for a very busy end of the year beginning with next week.  I will be traveling without my husband to visit my daughter, her significant other, and my grand-daughter in Virginia Beach.  I am looking forward to the adventure as I have never been there before.  I mean, how could anyone not LIKE the beach!  From there, my daughter and I will drive with the baby to Ohio to visit my mother and the rest of our family.  We will celebrate Stella’s first birthday there.  We will celebrate it again when we return to Virginia with her other grandmother who is set to arrive two days before I head back home.

Two weeks after returning to Colorado, my sister and brother-in-law will be visiting for three weeks as we plan a road trip to Yosemite National Park…or whatever is left of it after the devastating wildfires in Northern California this summer.  I’m sure it will be fun!  There are always wineries and Reno, Nevada and Lake Tahoe are only an hour away from where we will be staying.

November means…you guessed it…a week in Orlando, Florida with my bestie Carol for Stampin’ Up!’s 30 Anniversary Celebration at On Stage Live!  Can’t wait! Can’t wait!  I’ll get home and I will be very thankful that I DO NOT have to make Thanksgiving dinner this year as we have been invited elsewhere.  So that means I’ll have a month to get ready for Christmas!  Hopefully January will not be too much of a let down.

So this little project I am sharing today has been in the works for a while.  I think I created it in July and decided to hold off awhile before sharing it.  But then things started happening and I was almost afraid I wouldn’t get it posted at all.  This is probably the best time for it, because it is well in advance of the Christmas holidays, which gives everyone time to react and actually make it.  I had intended on doing a video, but when I started I just couldn’t seem to get my act together.  Maybe it has been too long since my last one.  So, I opted to do this the old-fashioned way by doing a written tutorial with a million and one photos to guide you.

The inspiration for this came one day while I browsing that web site that sucks your time away before you even realize it…what’s it called…Pintrist! 🙂 I saw this photo of a Christmas lantern and wondered why I couldn’t make one myself?!

So, one Sunday afternoon, I closeted myself into my tiny stamp room (my husband forgot about me until dinner time) with a pad of grid paper and a ream (there are 500 sheets in a ream)  of cheep card stock on the desk in front of me. (I should have taken photos of my process, but I didn’t).    And this is what I ended with.

There is no stamping in this project.  Just a lot of measuring and cutting and gluing.  I am very pleased with how it turned out.  As I’ve mentioned before, sometimes I impress myself.  It is amazing what we can do when we set our mind to it!  And I think I realized in the creation of this lantern why I like paper crafting so much.  When I was  kid I didn’t do a lot of cutting and pasting, and making a big paper mess.  We weren’t allowed because my mother always said it was wasting.  “Don’t waste the tape!” or “Don’t waste the paper!” was what I heard.  Don’t get me wrong, I’m not blaming Mom.  Times were different, money was tight.  Paper was needed for homework or school.  My mother grew up in Italy during World War II when you didn’t even think of coloring, or cutting, or pasting!

Any way…here are a few more photos and the link for the written tutorial.

If you have questions about it, please let me know.  I am willing to help.

Until next time…

Happy Stamping!


P.S.  I got the pine cones from a local craft store.  Or if you are lucky, you can go out to your own back yard.  🙂

Price: $110.00

Shop online 24/7

http://www.fancyforstampin.stampinup.net

Last Chance Stuff

This week has been an emotional one!  I learned early this week that my daughter and her partner along with my 6 month old grand-daughter will be moving cross-country because he has found a job.  Although I am thrilled that he has found work, (he’s been unemployed for a while), I am saddened that they will be moving so far away.  Currently they live an hour away in Denver and I’ve been averaging about a trip each week since she has been born just to hold and love on that sweet little girl.  Now we will be back to video chatting at least once each week like we did when my daughter visited India for six months several years ago.  That was nice, but it can never take the place of holding that sweet little bundle on my lap and repeatedly kissing those chubby little cheeks.  If you are a grandparent, you know how I am feeling.  We love our children with abundance, but when the grandchildren come around there is no feeling of love in the world that is greater.  I’m not sure I can explain it.

Okay…enough of feeling sorry for myself.  🙂

This week, after going to OnStage Las Vegas last weekend  and looking at the retiring list, I decided to create a little project using some of the retiring card stock.  Sorry, no video this month.  I decided that gift tags are always a nice little thing to have on hand because I am always giving some sort of gift.  Little 3 x 3 cards make the perfect gift tag size.  You can punch a small hole in the top corner, add a piece of twine and tie them to a gift bag handle.  Or you can place them into a small envelope and drop them inside the gift bag or attach them to the top of a wrapped gift.

I chose to use the retiring 2016-2018 In Color card stock; specifically Peekaboo Peach and Emerald Envy.  I could have used more, but I wanted to coordinate with the retiring Naturally Eclectic Designer Series Paper. So…I made a little gift of…gift tags!   There are 4 in this set.  Four 3 x 3 envelopes would fit perfectly in the wood crate box along with the cards.  Heck, you could probably get 6 cards and envelopes in there.

I also used Teeny Tiny Wishes stamp set.  I’ve had this set for so long!  Even though it is retiring, I will not part with it.  It has always been my go to set when I needed just the right sentiment.  It is so old, it’s wood mount.  I bought it before Stampin’ Up! ever started offering anything other than wood mount.

If there is anything you want that is retiring, order before supplies run out!  Here is a link for the retiring list from the Annual Catalog and the Occasions Catalog

As soon as I’m allowed, I will post a list of the stamps sets I have that are retiring and will be for sale at 50% off their original price.


Anyway, I hope you like it and I hope you enjoyed your visit today.  Until next time…

Happy Stamping!


Price: $16.00

Price: $110.00


Shop online 24/7

http://www.fancyforstampin.stampinup.net


Stamped Wine Bottle Wall Art

Hey Stampers!

I have a new video for you this month along with a new look on my blog.  Hope you like both.

The video is on a piece of wall art I CASED and created using the Half Full Stamp Set and the STAMPARATUS!   Wooo Hooo!  I finally got mine, and when I did I realized it would be perfect to use on this project.  The Half Full Stamp Set is a carry over from last year’s Holiday Catalog.   The video is a little long, but it is definitely worth the time.   I hope you enjoy making this project as much as I did.

Two items that are not listed in the supply list at the end of this post is a 5 x 7 shadow box frame in black and some washi tape to tack down the edges of your card stock and your letters dies.  Now on the frame, as I show you in the video, you do not need a shadow box frame.  You can use a less expensive $3.00 5 x 7 photo frame if you choose.  Your end product will be just as nice.

Just a reminder that SALE-A-BRATON ends on the last day of this month so if there is anything you have been wanting, but you have been putting of purchasing, now is the time.

Sorry about the glare and shadows in the following photos.


Here is my video!  Enjoy!  🙂


And now a word from Betty White!  🙂


Price: $110.00


shop online 24/7

http://www.fancyforstampin.stampinup.net