It seems the last two months have been a whirlwind of activities. I haven’t had much time to stamp, and I have missed it quite a bit. I’ve thought about it every day. The whirlwind started with our first time trip to Cancun, Mexico the week before Thanksgiving. Remind me never to take a vacation immediately before a major holiday again. We returned home the Monday just before Thanksgiving. I was fortunate in that I didn’t have to prepare Thanksgiving dinner as we were invited to a friend’s home for the event.
Shortly thereafter, Christmas preparations began with decorating, baking, and shopping. It seems we always make such a fuss for such a short amount of time. But, Christmas was excellent this year. We were lucky to have all four of our collective children home for the holiday. Only one, my daughter, lives out-of-town and she was able to be here. She doesn’t live that far out-of-town; she’s only a two-hour drive away in Ft. Collins, Colorado. I was able to spend four entire days with her, as her boss allowed her to work from home one of the days, so she worked from my home. Unfortunately, she had to return to work early the Friday after Christmas, so she had to leave here by 2:00 p.m. on Christmas day in order to miss the snow storm that was due to arrive. As it was, she hit snow just 5 miles north of Denver and had to spend the last hour of her trip driving in it.
Something else was thrown into the mix to make life a little extra hectic around the holiday. I started a new part-time job as a bagger at one of the local military commissaries the Saturday after Thanksgiving. For those of you that don’t know, a commissary is a grocery store on a military installation. Only active duty or retired military personnel and their dependents are allowed to shop in it. Government employees work in them as cashiers, butchers, etc. Only active duty or retired military and their dependents can be baggers. Baggers work for tips only. My husband put his name on the waiting list to be a bagger about a year ago. He thought it would be a good thing to do to keep himself busy since he retired from his civilian job. It has been 10 years since he retired from the Air Force. He started bagging in September. After his first day of work, he came home with $60.00. I said, “Hey, how hard can it be? It isn’t rocket science. Put my name on the list. I want $60.00 a day for bagging groceries too!” So¸ he put my name on the list. I didn’t expect to be called for about a year. But, the phone call came the week before we went to Cancun.
It is low stress, and those bags and buggies don’t talk back like kids (or parents and principals) do. LOL! How hard is it to bag groceries?
You would think it is simply putting groceries into a bag, but did you know there are thirteen rules on the How to Bag Groceries hand out presented to me at New Bagger Orientation! In addition, there are 34 items on the Line Procedures and Bagging Rules to Promote Equality for all Baggers handout. (Recently revised on September 19, 2014, so I know it is current). Moreover, I had to sign a Commissary Bagger Independent Contractor Agreement and the Defense Commissary Agency’s Bagger Standard Operating Procedures before I could start working. So is it NOT rocket science?
Some of the baggers I am working with have spent years perfecting their craft. Some have bagged for 10…No…20 years! I am not exaggerating. It is out of the bag now! Commissary bagging has been the life work of many. Imagine…20 years bagging groceries!
That is all I am going to write about this for now. Some of my experiences as a Commissary Bagger would, according to my children, make an excellent Will Ferrell movie. You will just have to wait until next time before you learn any more about my bagging adventures. I am sure you are waiting with bated breath.
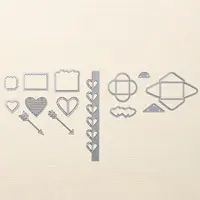
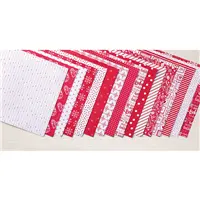
I got the inspiration for my card from December’s My Paper Pumpkin. It’s a Valentine Card that uses a few new things that you will be able to order when the new Occasions Catalog goes live next month. It is a pop up shaker card. I think that’s what you would call it. The stamp set I used is in the Annual Catalog and it is called Groovy Love. I used the new Confetti Heart Border Punch and new Stacked with Love Designer Series Paper Stack that will be available in the Occasions Catalog on January 6th. It looks as if I punched some confetti hearts out of white paper, but I didn’t. You are just seeing the backs of some of the ones I cut using the Red Glimmer Paper. Hope you like my creation and you enjoyed your visit today.

Until next time…
Happy Stamping!


You must be logged in to post a comment.