Elegant Leaves

Hi Stampers!

I am back this month with a fall card.  I can’t believe it is almost the end of August!   Even though it is technically still summer, I always decorate for fall in September and that is coming up fast. .  I am  not ready for cooler weather at all.  I’m a summer kind of girl.  I don’t like being cold.

I created three different cards with the Elegant Leaves Bundle that will be available on September 1st in the September to December Catalog . They are all similar yet different in one way or another.  And I like some more than others.  I’ll let you decide which you like best.

This was the first card I made with the bundle.

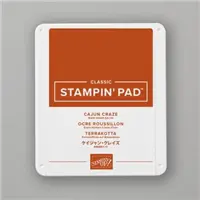
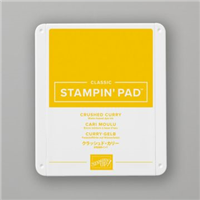
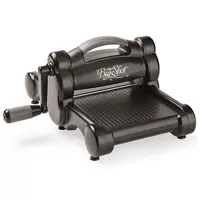
This card didn’t involve too much stamping. Just the sentiment is stamped.  It did involve a lot of die cutting though.  Which just goes to show, you can create a pretty card with just the dies and a sentiment from another stamp set.  In this case, the other stamp set is the Radiant Sunflower set which will also be available on September 1st.  I ran both the Cajun Craze layer and the cut out circle through the Stampin’, Cut and Emboss machine with the Timber 3D Embossing Folder.  The colors I used are Cajun Craze, Mossy Meadow, Crushed Curry, Crisp Cantaope, and Golden Glow.

This second card was a little unconventionally made.

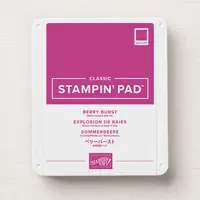
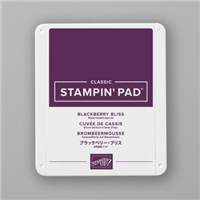
This card has a plaid background that I made using rubber bands.  I saw this technique done by another demonstrator and thought I would give it a try.  I wrapped three thick rubber bands around a long and narrow clear block lengthwise.  I used clear block I but it is no longer available through Stampin’ Up!  I made sure they were evenly spaced.  I even used a ruler!  I inked the rubber bands with Blackberry Bliss ink and stamped across a 3-3/4″ x 5″ piece of basic white card stock.  Once I was done going down the sheet in one direction, I turned the card stock a quarter turn, and stamped in the other direction.   When I was finished stamping with the thicker bands, I removed them and added one thinner rubber band lengthwise and stamped the thinner line in Berry Burst.  I had to re-ink the rubber bands before stamping each time.   I have to say that it was a messy process.  Ink not only gets onto the rubber band but the clear block as well.  That means you have to be very careful not let the block touch your paper.  You can see by looking close up that I wasn’t so successful in doing that.  And my thinner lines are totally straight.  But, once I covered everything with the cut out circle, it didn’t look so bad.  I used the stamp set as if it were a two-step set stamping the leaves with Berry Burst first.  Then I stamped the veins in the leaves with Blackberry Bliss.  The third smaller leave is cut out of Fresh Freesia with Berry Burst Veins.

And my third card…

My third card is my favorite card!  I used the Stampin’ Up! hot foil system to create this card, and I once again used the stamp set as if it were a two-step stamping set.   The foil brick work was done using Echo of Details Hot Foil Dies.  I also used a piece of August’s Product of the Month which is the Glow of Harvest DSP.  In this card I stamped the solid leaf images in Crisp Cantalope and Golden Glow ink onto a piece of Very Vanilla card stock.  Then I stamped the vein of the leaves in Cajun Craze and Crushed Curry ink.  I used the brick-work hot foil die on the Cajun Craze card base toward the right side and added a 1-1/2″ x 5-1/4″ piece of Glow of Harvest DSP to the left side of the base.  The card base is 5-1/2″ x 8-1/2″ folded in half at the 4-1/4″ mark.

I hope you enjoyed your visit .  As always, if you have any questions, feel free to email me.

Until next time…

Happy Stamping!


Pop-Up Valentine in a Box

Hello Stampers!

Today I am sharing a video on how to make this special Valentine card for the special person in your life.  This one is for my husband…lucky guy!  🙂

pop-up-valentine-in-a-box-2

pop-up-valentine-in-a-box-1

What makes this Valentine so unique is it comes in a box, and when you remove the lid, the card pops up out of the box.

pop-up-valentine-in-a-box-3pop-up-valentine-in-a-box-4


Adorable!  And it is really easy to make.

I hope you enjoy your visit today!  Until next time…

Happy Stamping!

Josie2


Save

Price: $110.00

Save

Save

Save

Save

Save

Pop of Pink

Hello Everybody!

It has been way too long since I’ve posted anything here!  I am just now getting back into the swing of things.  It was a busy, busy summer for me.  It started in June with a two-week visit from my sister and brother-in-law,  a three-week visit from my mom in July, and a two-week trip back home with my mom in August.  Once I got back I had a club to prepare for and then  it was right into getting ready for the booth I shared with a friend at the Colorado Springs Women’s  Living EXPO 2016 last weekend.  I think things are back to normal…whatever “normal” is.

I’ve had this card and box done for a while. I’ve been wanting to share it with you.  But I wanted to create a video to go along with the box and card.

black-pink-flamingo-card-and-box

black-pink-flamingo-card

black-pink-flamingo-box-2

I finally had the opportunity to create a video for them today.  I’ve done this project in two parts.  Part 1 is the card and part 2 is the box.  I hope you enjoy.  There is a PDF file you can print  if you like.  There is a list of items you need at the end of this post and in the printable PDF.

Enjoy yourself while you watch and create.  Let me know how things turn out.


Here is the link for the PDF file I promised.


Until next time…

Happy Stamping!
Josie2


Save

Save

Save

Save

Save

Save

Save

Save

Save

Eight Do’s and Don’ts for DIY Garbage Disposal Replacement

If you have ever owned a home with a garbage disposal in the kitchen, then you know they don’t last forever and will eventually need replacing.  The person at Home Depot said they last about 10 years.  We’ve been in our home for 14 and we just now had to install a new one.  We don’t know how long it was in the place before we moved in.  A mid-range new unit runs over $100.00. ($149.00 to be exact.)  If you are anything like we are, you will want to save on the installation if possible.  My husband and I spent some time replacing our garbage disposal yesterday, and I wanted to share a few things that we learned in the process. .

1. Watch this video before you start. Make your husband watch it too. If he is anything like mine, he will not want to but he admitted afterwards that he was glad he did. It gives you a list of all of the tools and materials you will need in order to install your new unit.

2. Look at the unit you will be replacing and how it is connected. Determine the correct size of the unit you will be replacing before purchasing a new one.

3. Will you need to purchase an installation kit as the video says? Don’t let the salesperson at your local home improvement store talk you out of it if you think you need one. If you end up not using it, you can always return it. It will save you a trip to the store in the middle of the process.

We purchased our new disposal without doing any of this beforehand and it resulted in two trips to Home Depot while we were installing the new unit. The first trip was for the salesperson to talk my husband out of getting an installation kit, and the second was actually to purchase the kit. What should have taken an hour at the most, took four instead.

4. Read the installation instructions that come with your new unit. Again, your husband won’t want to do this, but trust me…he won’t be sorry if he does.

5. Do not believe the person at Home Depot when he says it will be simple. In theory, it is, but you know the person that made the video I shared used the art of editing before he posted it! Duh!

In retrospect, the most difficult part of the installation was hanging the new unit.  They are heavy and neither my husband nor I were able to hold it up in place long enough in order to connect it.  I have no upper body strength, and my husband has a physical condition that prevents him from lifting his arms over his head.  Just as I was admitting defeat and calling my son for help, my husband gave it, one last shot and got it connected.

6. Learn to cuss. As a young child, I used to watch my father do things around the house like work on plumbing, etc. Things always seemed to go better when Daddy cussed. I tried this myself once and it worked. I think my husband  cussed just as the disposal unit finally slipped into place.

7. Maintain a sense of humor throughout the process.

So, four hours, a migraine and a stiff neck later, I have a new garbage disposal!  We saved at least $100.00 by installing it ourselves.

8. I almost forgot to mention one last thing we learned while replacing our garbage disposal and you should remember while you are replacing yours. When the old unit is disconnected and the new one not yet attached…remember…DO. NOT. Turn. On. The. Water! Unless, of course, you mean to mop your kitchen floor in the process.

So here is my creation for today.  It uses an oldie but goodie stamp set Thoughts and Prayers.

All Occasions Class Thinking of You

Hope you enjoyed your visit here today.  Until next time…

Happy Stamping!

Josie2