Petal Passion


Spend $50.00 or $100.00 in my online store and get a select item FREE in the Sale-A-Bration Catalog!

Download the Sale-a-Bration Catalog by clicking on the image to the right

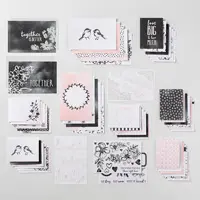
I am loving this beautiful Petal Palette  stamp set!  Actually, I am loving the entire Petal Passion Suite!  And this card proves there are more uses for the Petal Passion Memories and More Card Pack than just memory keeping.  The cards, $1.00 less than the Petal Passion Designer Series Paper can be used for card making as well as memory keeping.  That doesn’t mean I like them more than the DSP, it just means they are versatile and can be used for both, just like the designer series paper.  If I could only purchase one, I would purchase the card pack.

I also love the versatility of simple black and white.  That means I can customize the paper or the cards to go with whatever colors I might have on hand like I did with this card.

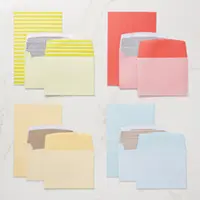
I started by selecting the polka-dotted card base from the Sale-A-Bration Tutti-Frutti Cards & Envelopes that I got FREE after placing a $50.00 order.  You can get them too if you place a qualifying order in my online store.  I then chose this card from the Petal Passion Memories & More Card Pack.

I trimmed the card down to measure 5-1/2″ x 3-3/4″ and colored it with my Stampin Blends.  I also stamped a few flowers on it in Calypso Coral using the flower stamp from Petal Palette Stamp Set.  I stamped off before stamping on the card because I didn’t want it to be real dark.

Then I attached the card to the Pool Party card base.  I stamped the bird and branch on a piece of Whisper White card stock and cut it out with one of the circles from the Layering Circles Framelits Dies.  I used dimensionals to hold everything down on the base.

And here is my finished product!

Hope you enjoyed your visit here today!  Until next time…

Happy Stamping!


Shop Online 24/7

http://www.fancyforstampin.stampinup.net

Bold Butterfly & Kinda Eclectic…First Video Tutorial

Hello, Stampers,

Today I am sharing my first video tutorial EVER!  I am both excited and nervous all at the same time.  For my first try, it didn’t turn out so bad, but I realize there is room for improvement.  I only plan on getting better from here.

The creation I am sharing is a window box and 4″ x 4″ cards and envelopes I made using the Kinda Eclectic stamp set.   As I mention in the tutorial, the cards are too small for the regular mail, but the entire set will make a great gift for someone, and they can use the cards as gift tags.

Bold Butterfly & Kinda Eclectic 4 x 4 Card Box side view

Bold Butterfly & Kinda Eclectic 4 x 4 card with envelope


If you want to download the PDF instructions for this project just click here.

Hope you enjoy the video!

If you have any questions, as always, please feel free to get in touch with me.

Until next time…

Happy Stamping!

Josie2


Grateful Bunch

My up line challenged all of us last week.  She called it Creative Weekend Challenge and she shared this template.

Template-1

She said, “Make something,” so…

I started with this…


Delightfull Bunch Daisy You are Loved-2

I thought this one had too much blue in it, so…

I made this one.  I still didn’t care for it so I  turned it on its side.  🙂  It was much better! 🙂


Delightfull Bunch Daisy You are Loved-1

I cut out the flowers on both by hand.  I also used the 2014-2016 Stampin’ Write Markers Lost Lagoon and Hello Honey for the top card and Calypso Coral and Hello Honey Stampin’ Write Markers for the second card along with ink pads.   I also used the Sale-a-bration item Wildflower Fields Designer Series Paper.  Hope you like them.  They are both nice.  🙂

Until next time…

Happy Stamping!

Josie2


Eight Do’s and Don’ts for DIY Garbage Disposal Replacement

If you have ever owned a home with a garbage disposal in the kitchen, then you know they don’t last forever and will eventually need replacing.  The person at Home Depot said they last about 10 years.  We’ve been in our home for 14 and we just now had to install a new one.  We don’t know how long it was in the place before we moved in.  A mid-range new unit runs over $100.00. ($149.00 to be exact.)  If you are anything like we are, you will want to save on the installation if possible.  My husband and I spent some time replacing our garbage disposal yesterday, and I wanted to share a few things that we learned in the process. .

1. Watch this video before you start. Make your husband watch it too. If he is anything like mine, he will not want to but he admitted afterwards that he was glad he did. It gives you a list of all of the tools and materials you will need in order to install your new unit.

2. Look at the unit you will be replacing and how it is connected. Determine the correct size of the unit you will be replacing before purchasing a new one.

3. Will you need to purchase an installation kit as the video says? Don’t let the salesperson at your local home improvement store talk you out of it if you think you need one. If you end up not using it, you can always return it. It will save you a trip to the store in the middle of the process.

We purchased our new disposal without doing any of this beforehand and it resulted in two trips to Home Depot while we were installing the new unit. The first trip was for the salesperson to talk my husband out of getting an installation kit, and the second was actually to purchase the kit. What should have taken an hour at the most, took four instead.

4. Read the installation instructions that come with your new unit. Again, your husband won’t want to do this, but trust me…he won’t be sorry if he does.

5. Do not believe the person at Home Depot when he says it will be simple. In theory, it is, but you know the person that made the video I shared used the art of editing before he posted it! Duh!

In retrospect, the most difficult part of the installation was hanging the new unit.  They are heavy and neither my husband nor I were able to hold it up in place long enough in order to connect it.  I have no upper body strength, and my husband has a physical condition that prevents him from lifting his arms over his head.  Just as I was admitting defeat and calling my son for help, my husband gave it, one last shot and got it connected.

6. Learn to cuss. As a young child, I used to watch my father do things around the house like work on plumbing, etc. Things always seemed to go better when Daddy cussed. I tried this myself once and it worked. I think my husband  cussed just as the disposal unit finally slipped into place.

7. Maintain a sense of humor throughout the process.

So, four hours, a migraine and a stiff neck later, I have a new garbage disposal!  We saved at least $100.00 by installing it ourselves.

8. I almost forgot to mention one last thing we learned while replacing our garbage disposal and you should remember while you are replacing yours. When the old unit is disconnected and the new one not yet attached…remember…DO. NOT. Turn. On. The. Water! Unless, of course, you mean to mop your kitchen floor in the process.

So here is my creation for today.  It uses an oldie but goodie stamp set Thoughts and Prayers.

All Occasions Class Thinking of You

Hope you enjoyed your visit here today.  Until next time…

Happy Stamping!

Josie2