Last Chance Stuff

This week has been an emotional one!  I learned early this week that my daughter and her partner along with my 6 month old grand-daughter will be moving cross-country because he has found a job.  Although I am thrilled that he has found work, (he’s been unemployed for a while), I am saddened that they will be moving so far away.  Currently they live an hour away in Denver and I’ve been averaging about a trip each week since she has been born just to hold and love on that sweet little girl.  Now we will be back to video chatting at least once each week like we did when my daughter visited India for six months several years ago.  That was nice, but it can never take the place of holding that sweet little bundle on my lap and repeatedly kissing those chubby little cheeks.  If you are a grandparent, you know how I am feeling.  We love our children with abundance, but when the grandchildren come around there is no feeling of love in the world that is greater.  I’m not sure I can explain it.

Okay…enough of feeling sorry for myself.  🙂

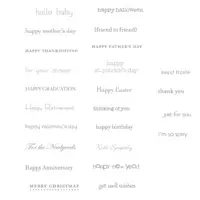
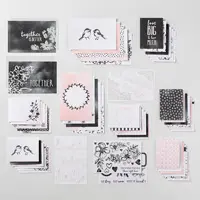
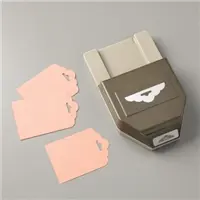
This week, after going to OnStage Las Vegas last weekend  and looking at the retiring list, I decided to create a little project using some of the retiring card stock.  Sorry, no video this month.  I decided that gift tags are always a nice little thing to have on hand because I am always giving some sort of gift.  Little 3 x 3 cards make the perfect gift tag size.  You can punch a small hole in the top corner, add a piece of twine and tie them to a gift bag handle.  Or you can place them into a small envelope and drop them inside the gift bag or attach them to the top of a wrapped gift.

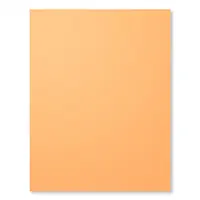
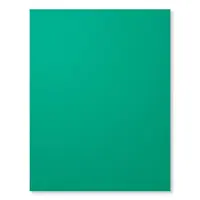
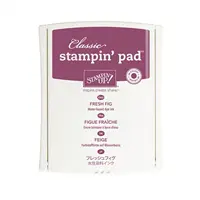
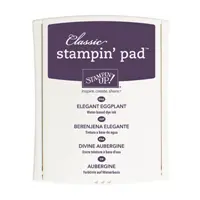
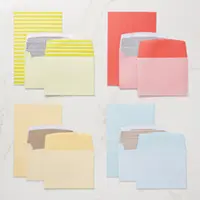
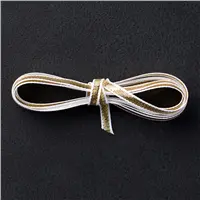
I chose to use the retiring 2016-2018 In Color card stock; specifically Peekaboo Peach and Emerald Envy.  I could have used more, but I wanted to coordinate with the retiring Naturally Eclectic Designer Series Paper. So…I made a little gift of…gift tags!   There are 4 in this set.  Four 3 x 3 envelopes would fit perfectly in the wood crate box along with the cards.  Heck, you could probably get 6 cards and envelopes in there.

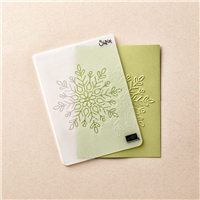
I also used Teeny Tiny Wishes stamp set.  I’ve had this set for so long!  Even though it is retiring, I will not part with it.  It has always been my go to set when I needed just the right sentiment.  It is so old, it’s wood mount.  I bought it before Stampin’ Up! ever started offering anything other than wood mount.

If there is anything you want that is retiring, order before supplies run out!  Here is a link for the retiring list from the Annual Catalog and the Occasions Catalog

As soon as I’m allowed, I will post a list of the stamps sets I have that are retiring and will be for sale at 50% off their original price.


Anyway, I hope you like it and I hope you enjoyed your visit today.  Until next time…

Happy Stamping!


Price: $16.00

Price: $110.00


Shop online 24/7

http://www.fancyforstampin.stampinup.net


Stamped Wine Bottle Wall Art

Hey Stampers!

I have a new video for you this month along with a new look on my blog.  Hope you like both.

The video is on a piece of wall art I CASED and created using the Half Full Stamp Set and the STAMPARATUS!   Wooo Hooo!  I finally got mine, and when I did I realized it would be perfect to use on this project.  The Half Full Stamp Set is a carry over from last year’s Holiday Catalog.   The video is a little long, but it is definitely worth the time.   I hope you enjoy making this project as much as I did.

Two items that are not listed in the supply list at the end of this post is a 5 x 7 shadow box frame in black and some washi tape to tack down the edges of your card stock and your letters dies.  Now on the frame, as I show you in the video, you do not need a shadow box frame.  You can use a less expensive $3.00 5 x 7 photo frame if you choose.  Your end product will be just as nice.

Just a reminder that SALE-A-BRATON ends on the last day of this month so if there is anything you have been wanting, but you have been putting of purchasing, now is the time.

Sorry about the glare and shadows in the following photos.


Here is my video!  Enjoy!  🙂


And now a word from Betty White!  🙂


Price: $110.00


shop online 24/7

http://www.fancyforstampin.stampinup.net

Petal Passion


Spend $50.00 or $100.00 in my online store and get a select item FREE in the Sale-A-Bration Catalog!

Download the Sale-a-Bration Catalog by clicking on the image to the right

I am loving this beautiful Petal Palette  stamp set!  Actually, I am loving the entire Petal Passion Suite!  And this card proves there are more uses for the Petal Passion Memories and More Card Pack than just memory keeping.  The cards, $1.00 less than the Petal Passion Designer Series Paper can be used for card making as well as memory keeping.  That doesn’t mean I like them more than the DSP, it just means they are versatile and can be used for both, just like the designer series paper.  If I could only purchase one, I would purchase the card pack.

I also love the versatility of simple black and white.  That means I can customize the paper or the cards to go with whatever colors I might have on hand like I did with this card.

I started by selecting the polka-dotted card base from the Sale-A-Bration Tutti-Frutti Cards & Envelopes that I got FREE after placing a $50.00 order.  You can get them too if you place a qualifying order in my online store.  I then chose this card from the Petal Passion Memories & More Card Pack.

I trimmed the card down to measure 5-1/2″ x 3-3/4″ and colored it with my Stampin Blends.  I also stamped a few flowers on it in Calypso Coral using the flower stamp from Petal Palette Stamp Set.  I stamped off before stamping on the card because I didn’t want it to be real dark.

Then I attached the card to the Pool Party card base.  I stamped the bird and branch on a piece of Whisper White card stock and cut it out with one of the circles from the Layering Circles Framelits Dies.  I used dimensionals to hold everything down on the base.

And here is my finished product!

Hope you enjoyed your visit here today!  Until next time…

Happy Stamping!


Shop Online 24/7

http://www.fancyforstampin.stampinup.net

Envelope Mini Album

Hello Stampers!

No, I have not fallen off the face of the Earth; I am still alive and well!  The last few months have been pretty busy as you can imagine.  My daughter gave birth three days after my last blog entry and much of my time has been spent admiring her and her partner’s handiwork.  Baby Stella is beautiful if you ask me!  I am totally in love with her. 🙂  In October my mom, sister and brother-in-law visited to see the baby and just last week I was in Salt Lake City for OnStage 2017.  So the last few weeks have been busy.

If you will indulge me for a moment, I want to share a few pictures of the newest edition to my family.  Thank you in advance for humoring me.  I know all Grandmas think their grandchildren are beautiful and I promise I will not make this a habit.  🙂  These are from earlier this month.

Now on to the real reason why we are here.

I created this mini album awhile ago, but I wanted to make sure I shared it before too much more time passes, because I think something like this would make a really good Christmas gift to someone you love…maybe a new Mom or Grandma!  Now you know what I plan on doing with mine.   Both videos run a little long, but I think they are well worth the time.  I don’t go into details on the decoration of each page, but I have included a photo of each at the end of this post with a description of what I used to decorate it.  I hope you like what you see and take the time to make one for yourself.  I think it would be well worth your time.

Enjoy the videos, and if you have any questions about anything related to this project, please email me.


Until next time…

Happy Stamping!


These are the front covers of both albums.

This is the inside of the front cover and the pocket on page 1.

Pages 2 and 3.  On the page 3 on the right I cut a reindeer in gold foil and quartered a foil snowflake for each corner.

Pages 4 and 5.  I made pockets on each page.

Pages 6 and 7.  I used the snowflake dies from the Seasonal Layers Thinlits and the 1/2″ circle punch to make the circles on the right.  The left side is a pocket with a half circle notch cut at the top edge using the 1″ circle punch.  I also cut a foil snowflake in half and glued it over the pocket and cut the center out with the 1″ circle punch.  I used the Winter Wonder and Holly Textured Embossing Folders one each page.

Pages 8 and 9.  A small corner pocket and bands to hold photos/mementos.

Pages 10 and 11.

Page 12 and inside of back cover.


Shop On-line 24/7

http://www.fancyforstampin.stampinup.net