Hello Stampers!
I decided to do something different today. I’m going to share my thoughts on turning sixty-five this upcoming February. I know it’s still three months away, but a few things happened this past week that got me thinking about it. So, I’ll share my thoughts with you and then I’ll share the video tutorial on how I made this card. I am also sharing another craft I recently completed other than stamping. I made some snowmen door hangings for decorations this Christmas season. I hope you enjoy everything. I’d love to hear what you think.
Soon I will celebrate sixty-five circles around the sun. That’s right! I will be 65 years old. Old enough to be on Medicare.
The last few times I spoke with my mother, I mentioned the fact that I would soon be signing up for a Medicare Advantage Plan. And whenever I mentioned it to her, she would laugh that “HA HA HA , you’re getting old laugh” ! When she does that I just ask, “So tell me what it’s like to be ninety years old, Mother?” (We celebrated her ninetieth birthday this past May.) Then she says she can’t believe she is old enough for her youngest to be on Medicare; that’s why the laugh. Guess what, Mom? Neither can I!
The thought of turning sixty-five makes me shake my head in disbelief and ask myself, “How?”… “When?”… “Really?”… “Oh my God!”… “Seriously?”
After a recent visit to the eye doctor, I learned I have the beginning of cataracts. CATARACTS! Did I hear him right? That’s something that happens to old people, isn’t it? My grandfather and mother had cataracts. How in the hell did I get them? When I told my husband about the cataracts, he laughed and said in a teasing tone, “You are getting old!” “Not as old as you who will be seventy next year!” I replied. When asked how it feels to be this age, my answer is, “What age? How does it feel to be any age? I don’t know! I’ve never been this age!”
If I think about my cerebral age, I think I’m not that old! I think I’m in my thirties, forties, or fifties. In my mind, I’m still forty! Not much has changed about my cognitive abilities since then. At least I don’t think much has changed. Except I notice that I do spend a lot of time walking up and down the steps in my house, (we have four levels) looking for my phone. Sometimes I even forget what I’m looking for. When I finally do remember, I thank heaven for my Apple watch! I remember I can use it to ping the phone’s location. I also notice that when I’m giving driving directions to someone, I will verbally say something like, “Turn right at the light” but I’ll gesture left. What’s that all about?
When I was in my fifties and still teaching full-time, my students would sometimes ask me how old I was. I never revealed my age, but I would give them a response like, “I still look good for someone in her sixties. Don’t you think?” And they would look at each other and say quietly, “She’s sixty!” as if to say…
“GAWD YOU ARE OLD!” and I would chuckle under my breath. In my mind, I am still in my fifties.
If I think about my corporal age, I think I’m able to do more than the Silver Sneaker seniors at the YMCA can do in their Silver Sneakers classes. I can still spin a good twenty miles in a 50-minute spinning class or walk unassisted for an adequate length of time. Never mind that my adult children walk as I did in my thirties. My mother used to tell me to slow down then. Now I say to my children, “You go ahead and run; I will walk.” And they chuckle and reply, “Mom…” What’s that all about?
Along with reaching Medicare age, I sometimes think of how much time I might have left, and I ask myself if I accomplished enough in the time I have been given? Did I do enough good? I wonder if I should die tomorrow, if I’ve done enough for my children so they will be good, responsible adults on their own. Did I teach them enough about life? Then I remind myself; they are responsible adults on their own right now. But that doesn’t mean that they don’t need me anymore, does it? I’m going to be sixty-five and at times I still need my mother. Besides, I’m not ready to leave them alone quite yet.
When I think of my mortality, I feel sad because one day my life will be over. Will my friends and family miss me? I will no longer be able to participate in the lives of my children and grandchildren. Was it that long ago that I gave birth to my kids? Will I get to meet my great-grandchildren?
So, as I chose a Medicare Advantage Plan earlier this week, I realize there are a lot of questions I have that only time will be able to answer. But as I prepare myself for the celebration of my 65th revolution around the sun, I tell myself to make the most of each day. Don’t take a moment for granted! My Italian mother once told me of an old Italian saying about the creases in the palms of our hands. Are you looking at yours right now? The creases form the letter “M” in each palm which stands for “Momento Morire.” Or in English, “At any moment, death;” nature’s way of giving us a daily reminder that our time on Earth is limited to a certain number of days.
I vow, as I age…I will do all I can to stave off both physical and mental degradation. I’ll stay as active as I can both physically and mentally. I realize I will slow down more as I grow even older. Certain things that happen to me might even be beyond my control. I will do all I can to ensure I have a quality of life before my time comes. I. Will. Not. Be. Afraid. Of. Another. Birthday! My incredibly wise father used to say at each of his birthdays as he grew older, “Keep them coming!” It sure beats the alternative!
These are the snowmen door/wall hangings I made. I used picture frames and some Christmas supplies from the dollar store along with some retired Stampin’ Up! ribbon and DSP and a few current Stampin’ Up! supplies.
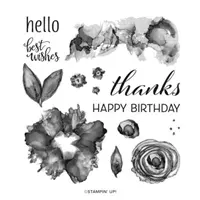
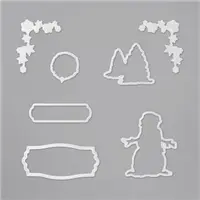
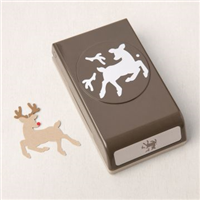
On the first snowman I stamped a piece of Basic White card stock cut large enough for the frame using Mint Macaron Classic Ink and the water color-wash stamp from the Artistically Inked stamp set just to give his face a little texture. I cut 1″ circles for his eyes using a 1″ circle punch and 1/2″ circles for his mouth and buttons using a 1/2″ circle punch. They are cut out of Basic Black card stock. I used the White Stampin’ Chalk Marker to make dots for button holes on the mouth and three buttons on both snowmen. I drew the carrot for the nose and hat free hand on both. The nose on both is cut from a piece of scrap Pumpkin Pie card stock and outlined with the dark Soft Suede Stampin’ Blend. The hats are cut out of black felt (2 pieces per hat). I drew the hat on a piece of cardboard from a pack of 12″ x 12″ DSP and cut it out, then traced it onto a piece of black felt a little larger than the cardboard cut out. I then hot glued a piece of felt to the front and back of the cardboard. All the decorations are from Dollar Tree except for the green striped ribbon on the first snowman and the red ribbon around the hat on the second snowman. Both of these ribbons are leftover retired stuff. All decorations on both snowmen are hot glued to the front of the frames. I cut a length of ribbon (I didn’t measure) and hot glued it down the center back of each frame. You could also add three branch arms to each if you like. I don’t think I am quite finished with each of these. I may add a big bow to the “neck” area on each and maybe arms.

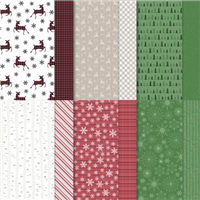
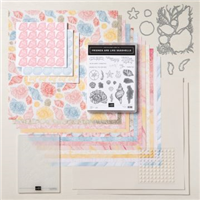
I used some left over Peaceful Prints Designer Series Paper for this second snowman. Unfortunately, it was a fall Sale-a-bration item and is no longer available.

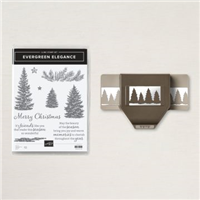
So my card today is more of a gate fold box card. I saw it somewhere on Pinterest.com but for the life of me can’t remember who it was that was sharing it. It took awhile to figure out, but I managed to get a pattern down for the card. You can download a copy of the template for it here.


I hope you enjoy the video and the other things I had to share today. If you have any questions about any of it, please let me know. Until next time…
Happy Stamping!


You must be logged in to post a comment.