Hello all! I’ve been MIA for the last several weeks. I can’t say that I remember all that has kept me away and out of my stamp room. I guess that is part of growing older. I know I did something; I just can’t remember what it was. 🙂
My husband and I received our second Covid vaccine about 6 weeks ago. It knocked me out of commission for about 24 hours afterwards with flu-like symptoms: fever, chills, muscle aches, and tiredness. But like I said, it went away after about 24 hours. I also helped my daughter move into her new home last week. She is a first-time home buyer and she is in for a wonderful adventure! So, I was out of town for about three days. Oh! And since I am now fully vaccinated, I have gone back to doing in-person stamp club each month in my home. I had my first one about a week and a half ago. So that has kept me busy. And I do remember spending a great deal of time on other crafts like making a hot air balloon Easter basket for my grand daughter and coffee filter flowers. I made several paper-rose arrangements and an arrangement of hydrangeas out of coffee filters. Although they are relatively easy to make, they are somewhat time consuming. So I guess I’m not as scatterbrained as I initially thought. I managed to remember everything that has been keeping me otherwise occupied along side the routine daily household stuff.
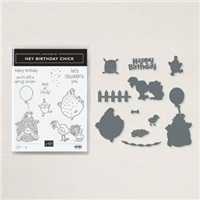
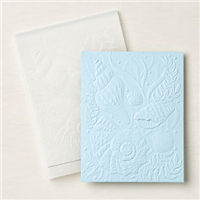
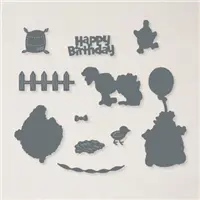
The card I’m sharing today pairs the Happy Birthday Chick stamp set with All Wired Up to give the appearance of a chicken behind chicken wire; All Cooped Up! It is a simple card to make and I will share dimensions. I used the standard shadow box card format to create it. ALSO, THE STITCHED SHAPES DIES ARE SET TO RETIRE, SO IF YOU WANT TO GET THEM, YOU NEED TO DO IT BEFORE THE END OF THIS MONTH!!!!!


Here are paper dimensions and a few directions that you will need to create this card.
- For card base you need two pieces of Crumb Cake card stock that measure 5 1/2″ x 10-1/2″″, and 5-1/2″ x 4″. With the long edge of this piece at the top of your scoring tool, score at 1/2″, 4″, and 8″. See diagram below.
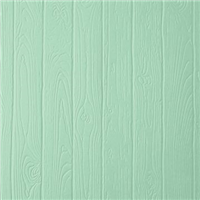
- Run the 5-1/2″ x 4″ piece of through the Stampin’ Cut & Emboss machine using the Pinewood Planks 3D Embossing folder. This will be attached to the front of the card.
- Inside the card you need one piece of Basic White card stock that measure 5 1/4″ x 3 1/4″. If you click on the diagram below, it will tell you where inside this piece is attached.
- On the inside of the front cover I used a piece of 3-3/4″ x 5-1/4″ piece of leftover Oh So Ombre 6 x 6 DSP from Sale a-bration. On the outside, the DSPmeasures 3-1/4″ x 5-1/8″.
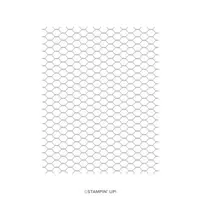
- One piece of window sheet cut to 3-3/4″ x 5-1/4″. Stamp this with StazOn ink using the All Wired Up stamp.
- Scraps of basic white to stamp the chicken images in Tuxedo Black Memento and sentiments in Bermuda Bay. I fussy cut around the sentiments and used the dies to cut the chicken images.
- Color the images with Stampin’ Blends.
- Cut an oval out of Crumb Cake cardstock and run it through the Stampin’ Cut & Emboss machine using the Pinewood Planks 3D Embossing folder.

If you watch my video from June 24, 2020 that can be found here, it will tell you how to assemble this type of card.
If you have ANY questions about assembling this card, please get in touch with me.
Hope you enjoyed your visit here today! Until next time…
Happy Stamping!


shop online 24/7
https://fancyforstampin.stampinup.net


You must be logged in to post a comment.