Four Things I Learned in Catholic School

Some would call me fortunate (or maybe unfortunate) that I had the opportunity to attend a Catholic school as a child from grades 1 through 8, and I also taught in a Catholic school for the first 6 years of my teaching career.   I learned many things both as a child and as an adult.  Many of the lessons have served me well in life.  Here are four of the lessons I learned as a student in a Catholic school in the 1960’s and 1970’s.

  1. Never wear black patent leather shoes with a dress.
  2. Never use a white tablecloth when entertaining a male guest.
  3. Take baths and showers with the lights off.
  4. If you sit on a boy’s lap, put a phone book down first.

What??????? You read them right!  I learned these lessons from a Nun.  Please don’t ask me to remember her name.  It was Sister Mary Something …either William, or George, or Grace, or Albert…it was Mary Something.  All the Nuns were Sister Mary Something when I was going to Catholic school.  And, they all wore those black and white habits.  They wore long black dresses with long black veils trimmed in white with nothing but their faces showing and they wore a long black rosary at their waists, like the Nuns in the movie Sister Act. Everything was covered.  As I entered the middle grades, I remember their strict dress code started to become a little less severe, and they no longer covered everything, although some of them probably should have.  They began to wear shorter skirts and their veils were shorter.  Veils were still trimmed in white, but a little of their hair began to show now.

I think I was in the middle grades when I learned these lessons from a Nun…in religion class.  It was either religion class or when we were learning about sex.  In those days, the boys were separated from the girls and the boys learned about boy sex and the girls learned about girl sex, but we never learned about reproduction sex.  Come to think about it, in Catholic school you learn about sex in religion class.

Anyway, let me explain these lessons.  The first, never wear patent leather shoes with a dress because a boy can see the reflection of your underwear in patent leather shoes.  Honest!  You can’t make this stuff up, people.  Well in the 60’s and 70’s girls very seldom wore pants and patent leather shoes were popular, so I often wondered what would happen if I didn’t wear any?  Underwear.

The next lesson, never use a white tablecloth when entertaining a male guest because he might think it is a bed sheet and get the wrong idea.

Lesson number three; take baths and showers with the lights off so you don’t give yourself any ideas.

And finally number four, if you sit on a boys lap, put a phone book down first.  I don’t think I need to explain this one, do I?

So there you have it, four lessons I learned when I was a Catholic school student.  It is senseless to say when I taught in Catholic school, the religion/sex education classes I taught were much different, most Nuns no longer wore their black habits at all, and finally, we had no Sister Mary Anybody because we had no Nuns.  Some things do change for the better!

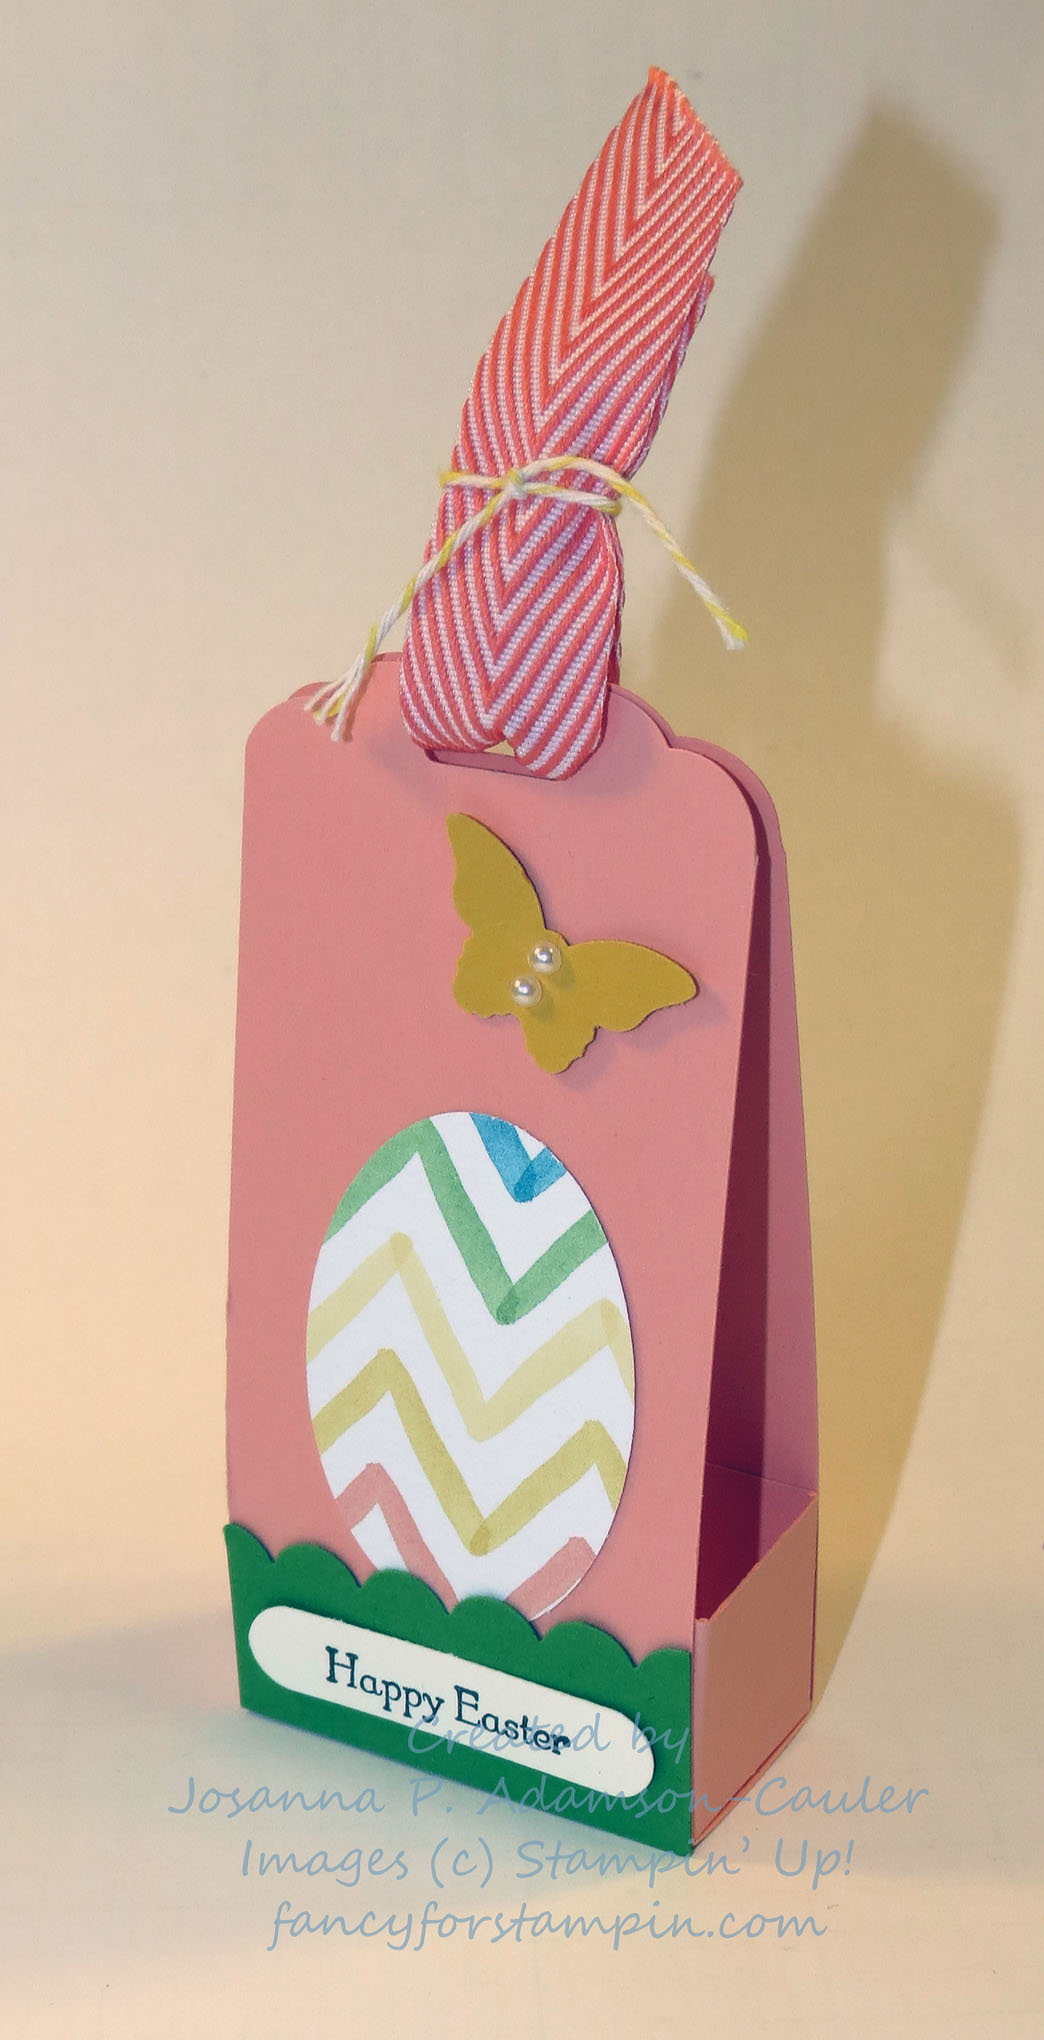
My project today is a votive candle box.  I needed a small gift for a friend, and I had an unusual amount of votive candles, so I decided to create a small gift box for a few of them.

Votive Candle Box 1

Here is the tutorial for the box.  You can also download a printable version for free here.

Votive Candle Box Tutorial

Supplies:

Paper:  1 piece of card stock measuring 7-7/8” x 9-1/2”; 3 pieces of designer series paper measuring 1-3/4” x 4-7/8”; 2 pieces of designer series paper measuring 1-3/4” x 1-3/4”.

Accessories:  Adhesive, paper snips, scoring tool, paper cutter, bone folder, sticky strip, 1” circle punch, corner rounder punch.
1.  With the long edge of the 7-7/8” x 9-1/2” piece of card stock at the top of your scoring tool, score at 2”, 4”, 6”, and 8” as shown in the template.

2.  Flip the paper so the short edge of the card stock is at the top of your scoring tool and score at 1-3/8” and 6-1/2” as shown in the template.

3.  As shown in the template, cut away portions shaded in gray.

4.  As shown in template, snip score lines as indicated in yellow.

votive candle box diagram

5. Valley- fold all score lines.

Votive Candle Box 2

6. Flip the piece over so that the folds are forming mountains and add adhesive to the second and third end flaps from the right. (See photo).

Votive Candle Box 3

7. Fold in the sides to form the box. (See next two photos.)

Votive Candle Box 4

Votive Candle Box 5

8. Using the 1” circle punch, center it on the front of the box as pictured and punch out a half circle.

Votive Candle Box 6

9.  Using the corner rounder punch, round the two corners of the remaining flap.

Votive Candle Box 7

10.  Close the box by inserting the front flap that you just used the corner rounder punch on and the two triangle shaped flaps on the sides into the box. If the triangle flaps give you any kind of trouble, remove them. They are not necessary.

Votive Candle Box 8

An Important Note:  This box is not designed for standard size votive candles.  The candles I used are Yankee Candles, which are wider at the top than at the bottom.  They are also a little taller.  Three standard size votives will fit into this box, but you will probably want to add a little tissue paper to cushion them.  In addition, six tea lights stacked in sets of two will also fit well into this box.

I sincerely hope you enjoyed your visit here today.  I have been entertaining out-of-town family for the last two weeks, otherwise it wouldn’t have been so long since my last post.  Until next time…

Happy Stamping!

Josie2

Votive Candle Box 9

Votive Candle Box 10

Father’s Day Pop-Up Card FREE Tutorial

It is the end of week 2 of my retirement, and I am still enjoying my time off.  The weather has been excellent and I’ve been able to get out into the yard and get a lot accomplished.  On Wednesday, my 27-year-old son (my baby) came over and helped me trim a bunch of the trees in the back yard.  We have a few pines that are at “giant” status that I’d like to remove and plant with fruit trees, but my husband says NO!  I think pines are beautiful, but they make a mess of your yard.  The needles kill the grass.  But with them trimmed back, the yard is looking like a refuge and that is what I was going for.

For the lack of a better name, I am calling this a stand-up card.  You could also call it a pop-up card or whatever kind of card you want to call it.  I need to let you know that my friend Cathy designed the card.  We did one that was similar to this at one of her stamp clubs.  But the decorating on this card is mine…all mine!  🙂  LOL!  I must mention the name of the designer series paper is High Tide and it is no longer available as it retired with the expiration of this year’s Occasions Catalog.  🙁

Father's Day - 10

Here’s a photo tutorial for the card.

Step 1:  Prepare the base.  Using the same color card stock or different colors…it’s up to you, cut three pieces measuring 4 ¼” x 5 ½”, 2 ½” x 4”, and 2 ½” x 4 ¼”.  See photo below.

Father's Day-1

Step 2:  Place the 2 ½” x 4 ¼” piece of card stock on your scoring tool with the long edge across the top.  Score it at  ¼” and again at 2 ½.  You can see the score lines in the above photo.

Step 3:  Cut two pieces of Designer Series Paper.  Cut one piece 4” x 5 ¼” and the other 2 ¼” x 3 ¾”.  See the next photo.

Father's Day - 2

Step 4:  Add a piece of sticky strip along the ¼” score line on the 2 ½” x 4 ¼” piece.

Father's Day - 3

Step 5:  Remove the backing from the sticky strip and attach it to the 4 ¼” x 5 ½” piece of card stock as shown in the photo below.

Father's Day - 4

Step 6:  Orient these two pieces of card stock so the 2 ½” x 4 ¼” piece is at the top of your work surface and begin attaching the Designer Series Paper (DSP).  First, attach the 4” x 5 ¼” piece of DSP to the card base so it covers where you just attached the 2 ½” x 4 ¼” piece.  (See the next photo.)

Father's Day - 5

Step 7:  Flip the card over and place a piece of sticky strip along the score line of the 2 ½” x 4 ¼” piece of card stock.  Place a second piece of sticky strip close to the edge.  (See photo.)

Father's Day - 6

Step 8:  Flip the card stock over again so that the smaller piece is at the top.  Fold it down and remove the backing from the sticky strip.

Father's Day -7

Step 9:  Adhere the 2 ¼” x 3 ¾” piece of DSP to the 2 ½” x 4” card stock base.  Attach this piece to the 2 ½” x 4 ¼” piece of card stock.  When it is attached correctly, it will look like this.

Father's Day -8

Step 10:  Decorate!

Father's Day -9

If you would like FREE printable version of this tutorial just click here.

Hope you enjoyed your visit here today.  Until next time…

Happy Stamping!

Josie2

Scallop Tag Topper Punch Treat Holder Tutorial

Today’s project is one I did not create. I have been feeling under the weather this week, and I have not been in my stamp room at all.  So I thought I would share a project that was created by a very dear friend of mine, Sharon S.  (I am sure she won’t mind.) I found it on my desk when I arrived at work the Monday after Easter.  It contained a solid chocolate bunny; however, you will notice by the picture the bunny is gone.  I think it disappeared about mid-morning when I needed a chocolate fix.  🙂  I admit, I am a chocolate addict.  If it is near me, it will not last long.  And, I am not happy with one or two pieces.  This little treat holder is adorable, and it is very versatile.  You can make one for just about any occasion.

ss easter treat

Want to make one?  Here’s how…

Step 1:  Cut a piece of card stock to measure 11″ x 2″.  Score it 5″ from either end.  Cut two more smaller pieces that measure 1″ x 2″ and score  each 1/2″ from either end.  See the photo below.

ss easter treat-1

Step 2:  Using the Scalloped Tag Topper Punch, insert each end of the longer piece and punch, then fold on the score lines.

ss easter treat-2

ss easter treat-3

Step 3:  Place a small piece of sticky strip on each end of the smaller pieces that you cut.  These are the sides of your holder that will keep the treat in place.

ss easter treat-4

Step 4:  Attach each side as shown below.

ss easter treat-5

Step 5:  Decorate as you desire!

ss easter treat-6

Until next time…Happy Stamping!

Josie2


Never Ending Birthday Card

Good morning!

I’ve taken the day off work as I have multiple medical appointments scheduled today.  Just routine women’s stuff;  nothing serious.  So between appointments I decided to go ahead and post my card that I have created this week.  You probably won’t hear from me this weekend.  I saw a video for this card on a facebook page to which I belong.  So, I can’t take credit for it. (Wish I could!)  I fell in love with it immediately, so I wanted to get one made and share it as soon as I could.  It’s called the never ending card because you can keep opening it and opening it and opening it at…

Here it is!

First…

Never Ending 1

Second…

Never Ending 2

Third…

Never Ending 3

Fourth…

Never Ending 4

Fifth…

Never Ending 5

Sixth…

Never Ending 6

Seventh…

Never Ending 7

Back to the beginning…

Never Ending 8

Ready to start all over again…

Never Ending 1

So, I know you want to know how to make this card.  Hope you can follow my directions!


Step 1:  Cut two pieces of card stock each measuring 5 1/2″ x 4 1/4″. (See photo below.)

Never Ending Card - 1

Step 2:  For the top portion of your card, use your paper trimmer and score each long edge at 1-1/16″.  Do this by placing the 4-1/4″ edge at the top of your paper trimmer.  (See photo below.)

Never Ending Card - 2

Step 3:  After making both score lines along the long edges of the card, turn your card stock so that a long edge (5 – 1/2″ edge)  is at the top of your paper trimmer and cut it in half at 2-3/4″.  You now have two pieces of card stock measuring 2-1/8″ x 5-1/2″ that you will use for the top of your card. (See photo below.)

Never Ending Card - 4

Step 4:  For the bottom portion of your card, take the other 4-1/4″ x 5-1/2″ piece of card stock and place a long edge (5-1/2″ edge)  at the top of your paper trimmer.  Score along each narrow edge  at 1-3/8″.   (See photo below.)

Never Ending Card - 3

Step 5:  After making your score lines along the short edges of your card stock,  flip the card stock so a 4 1/4″ edge is along the top of your paper trimmer.  Cut the card stock in half at 2-1/8″.  You will now have two piece of card stock measuring 2-1/8″ by 5-1/2″. (See photo below.)

Never Ending Card - 5

Step 6:  Fold along all score lines in both directions.

Step 7:  Lay both of the top pieces on the table in front of you, making sure to line up the score lines.   Add a piece of sticky strip to each corner as shown in the photo below.

Never Ending Card - 7

Step 8:  Attach both bottom pieces as shown below.

Never Ending Card - 8

Step 9:  After both bottom pieces are attached, flip the card over. This is the top (front) of the card.

Never Ending Card - 12

Step 10:  Open the card and smooth down the folds with a bone folder.  In  the next  photo below, I turned the card 1/4 turn so the 5-1/2″ edge is at the top of the photo.

Never Ending Card - 9

Never Ending Card - 10

Step 11:  Continue opening the card and smoothing folds.  Eventually, as you continue to open the card, you will return to the front of the card.

Never Ending Card - 11

Step 12:  Decorate the card any way you choose.

If you have any questions about this, please feel free to email me.  Some day soon I will begin doing video tutorials instead of photo tutorials.  I just need a little more time in the day, and I need to learn how to do it.  I’m sure it isn’t difficult.

Hope you enjoyed your visit here today.  Until next time…

Happy Stamping!

Josie2