I’ll NEVER Do THAT Again!

I would say I am an adventurous person.  I like to try daring things every once in a while.  But once I try them and see what they’re  like, the chances of me “doing it again” are slim to none.  I lived in Colorado for twenty years before I got up the courage to go white water rafting.  You see for me to do something daring or adventurous, I have to work on “getting up the courage.”  When I was in my twenties I  would just do things without thinking, but as I’ve grown older I’ve grown a little more cautious.  Or maybe I should say “smarter”?

I finally went white water rafting about five years ago when my nephew and his wife came out to Colorado for my daughter’s wedding.  Their two young girls were flower girls in the wedding, so they decided to make their trip to Colorado  their vacation that year.  White water rafting was something they wanted to do.  What is it about people who don’t live in Colorado that makes them think that all we people who DO live in Colorado want to do is white water raft?  Anyway, they wanted to go and asked my husband and I to go with them, so I agreed. My daughter came along as well.  My older sister, my nephew’s mother, well let’s just say she’s older than me so she is a little more cautious.  I won’t say “chicken”.  🙂

We booked a half day trip down the Arkansas River through the Royal Gorge with Raft Masters.  It was a guided trip in that we had our own guide on board our raft.  Chicken me wouldn’t go any other way!  Did I just call myself a chicken?  I was going on this trip!

The Royal Gorge is known as the Grand Canyon of the Arkansas River.  It is located near Canyon City, Colorado and measures about 50′ wide at the bottom and a couple hundred feet  across at the top.  Its sheer rock walls climb approximately 1200 feet from the river to the  top. While sitting on a raft at the bottom of the gorge, a feeling of  insignificance over took me as I looked up at the Royal Gorge Bridge. Built in 1929, the Royal Gorge Bridge is the world’s highest suspension bridge at 955 feet high and 939 feet long.  This part of Colorado is a major tourist attraction and a sight to behold!

Anyway, back to the rafting trip.  First thing we had to do was slip into a wet suit.  Well this was a first for me.  And slipping into a wet suit sounds easier than it actually is.   I found it nearly impossible to get into as it was wet, cold, skin-tight, and smelled like bleach.  It had been sanitized after the last person used it.  My daughter had to help me pull it up, and I had to do the same for her.  I hadn’t needed help pulling up my pants in years!  Wet suit finally on, next was a jacket, life jacket, helmet, boots…why was I doing this again?  Oh yea, now I remember…a moment of insanity when I didn’t want to disappoint my nephew.  Gee I am a good Aunt!  I hope he realizes it.

We took brief bus ride to the spot where we would be putting our rafts into the river.  During the ride we were given what I would assume was the standard safety briefing.  We were told what to do if we fell overboard.  Huh?  You mean I could… I looked at my husband with tear in my eyes and said very softly, “Gary…I don’t want to do this.”  He looked at me and said, “Oh, come on Jos…yes you do.  Besides we already spent all that money for this.  I bet we won’t get it back if you don’t go.”

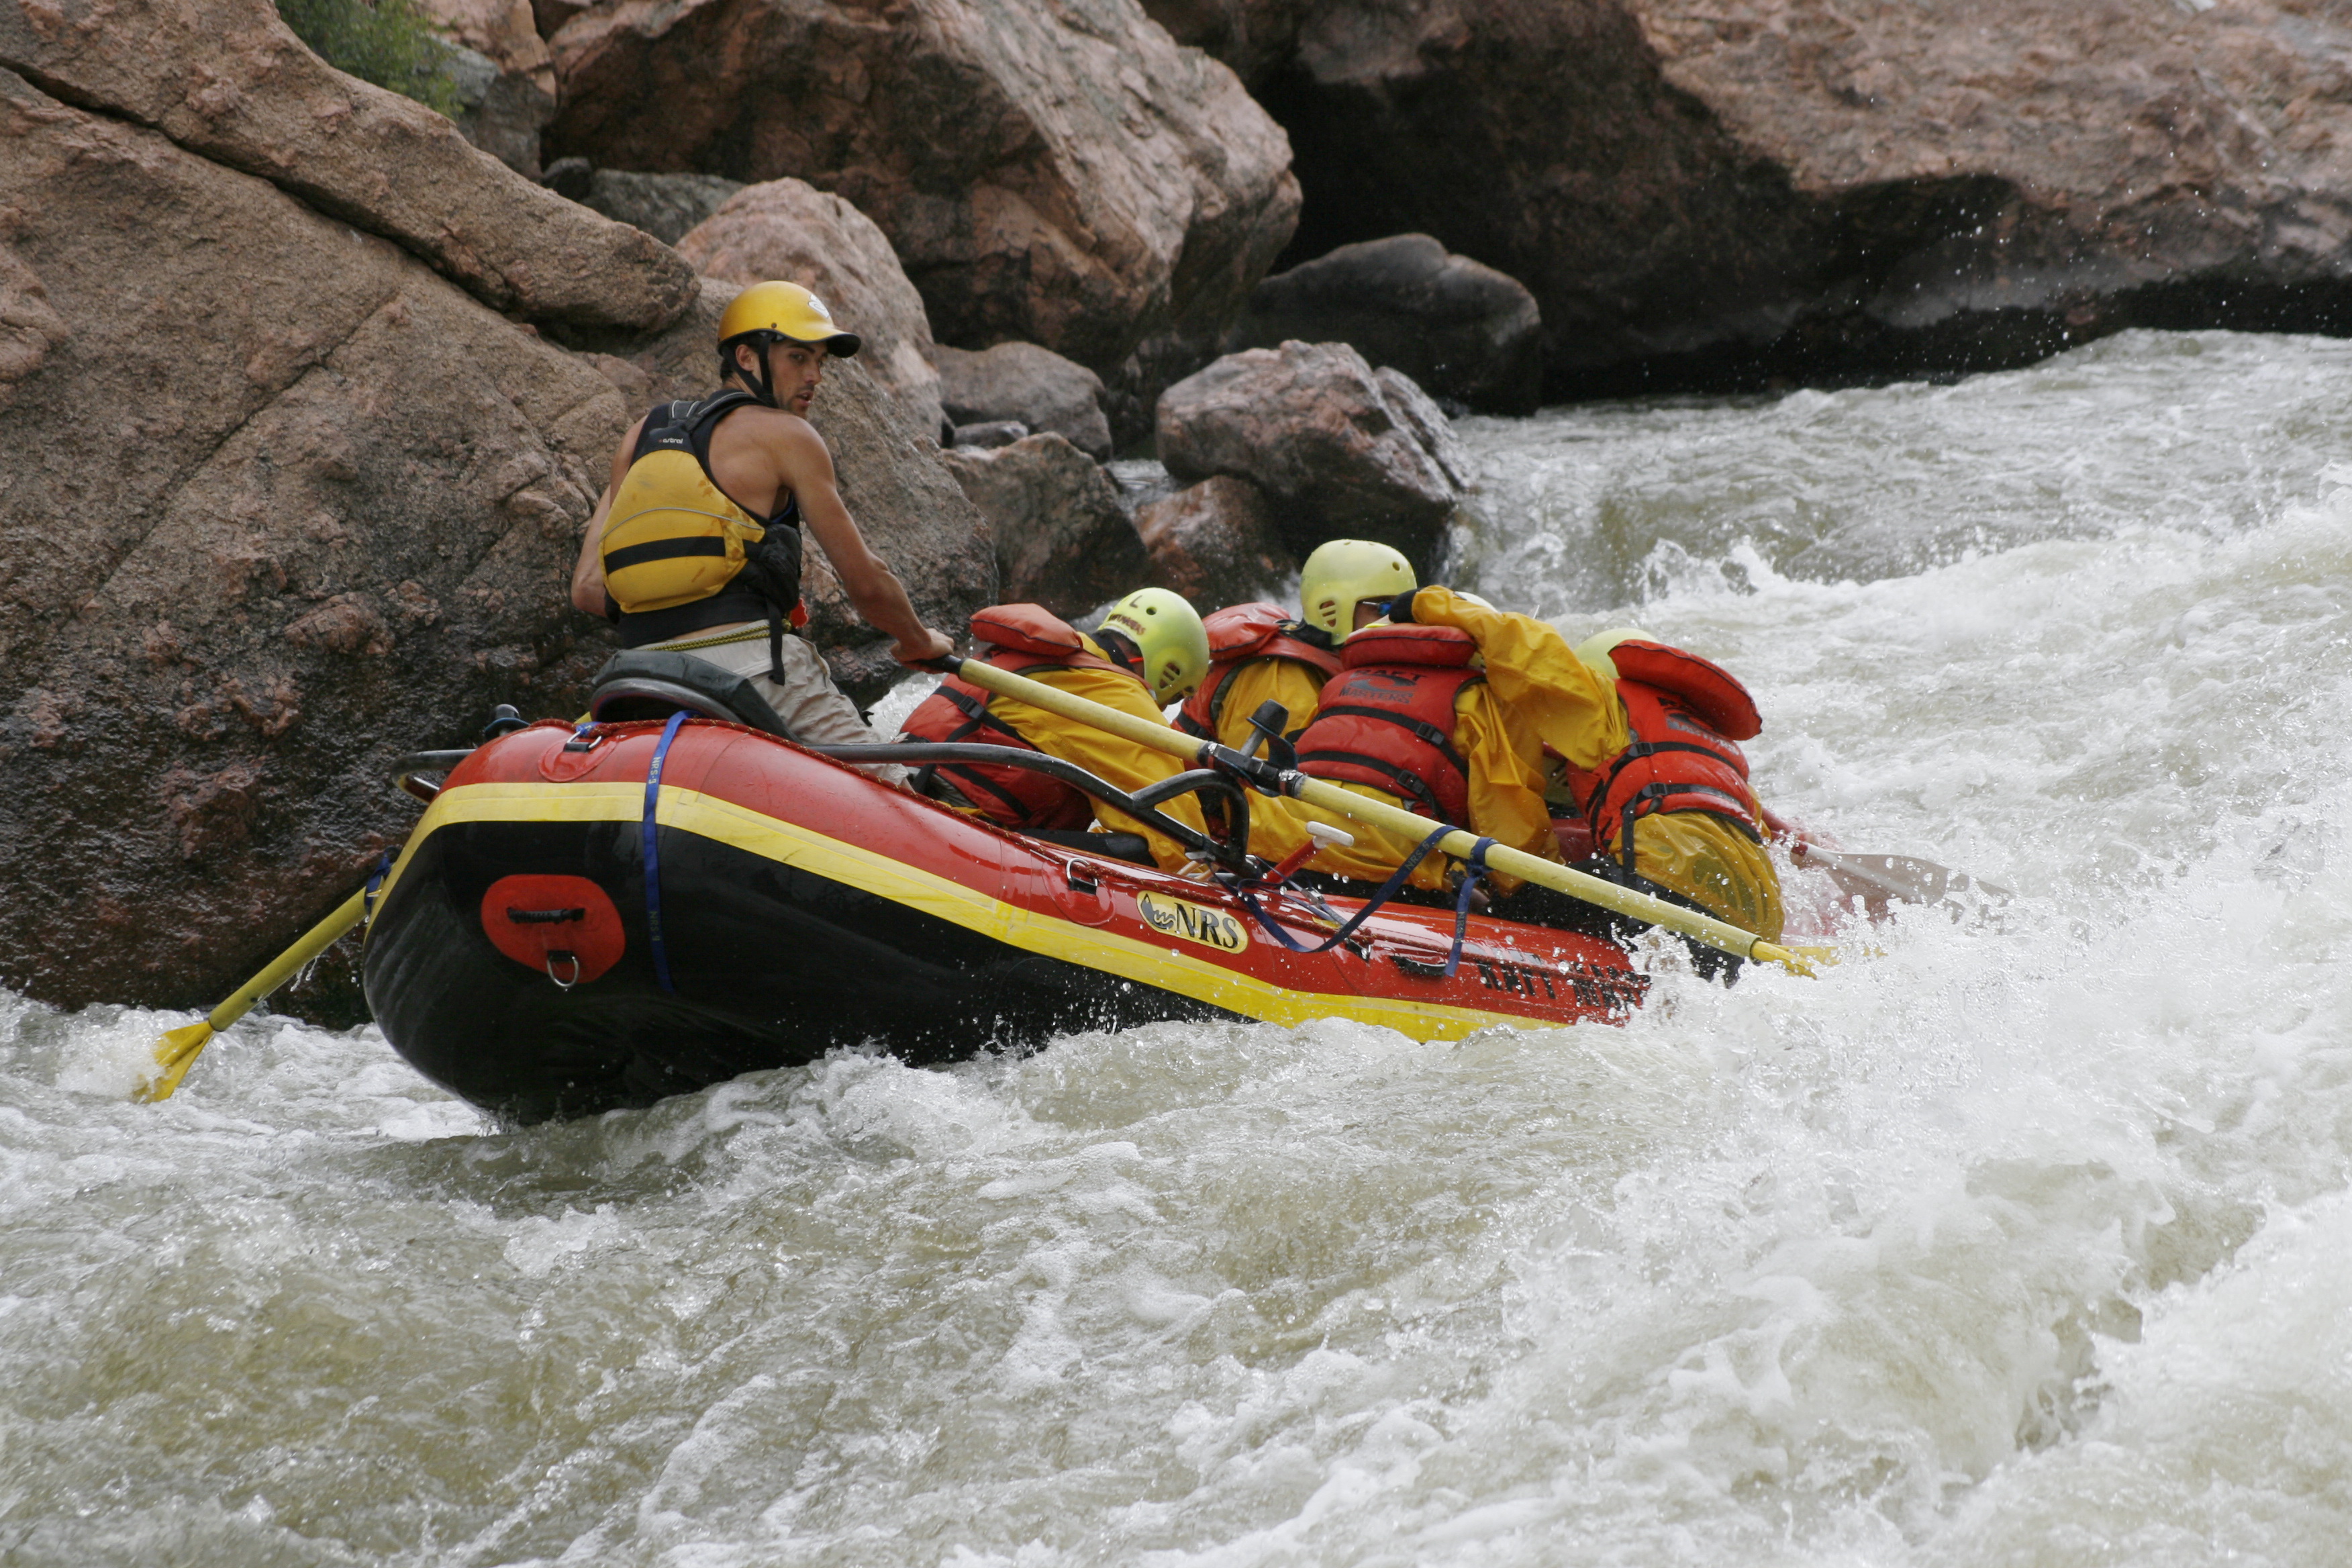
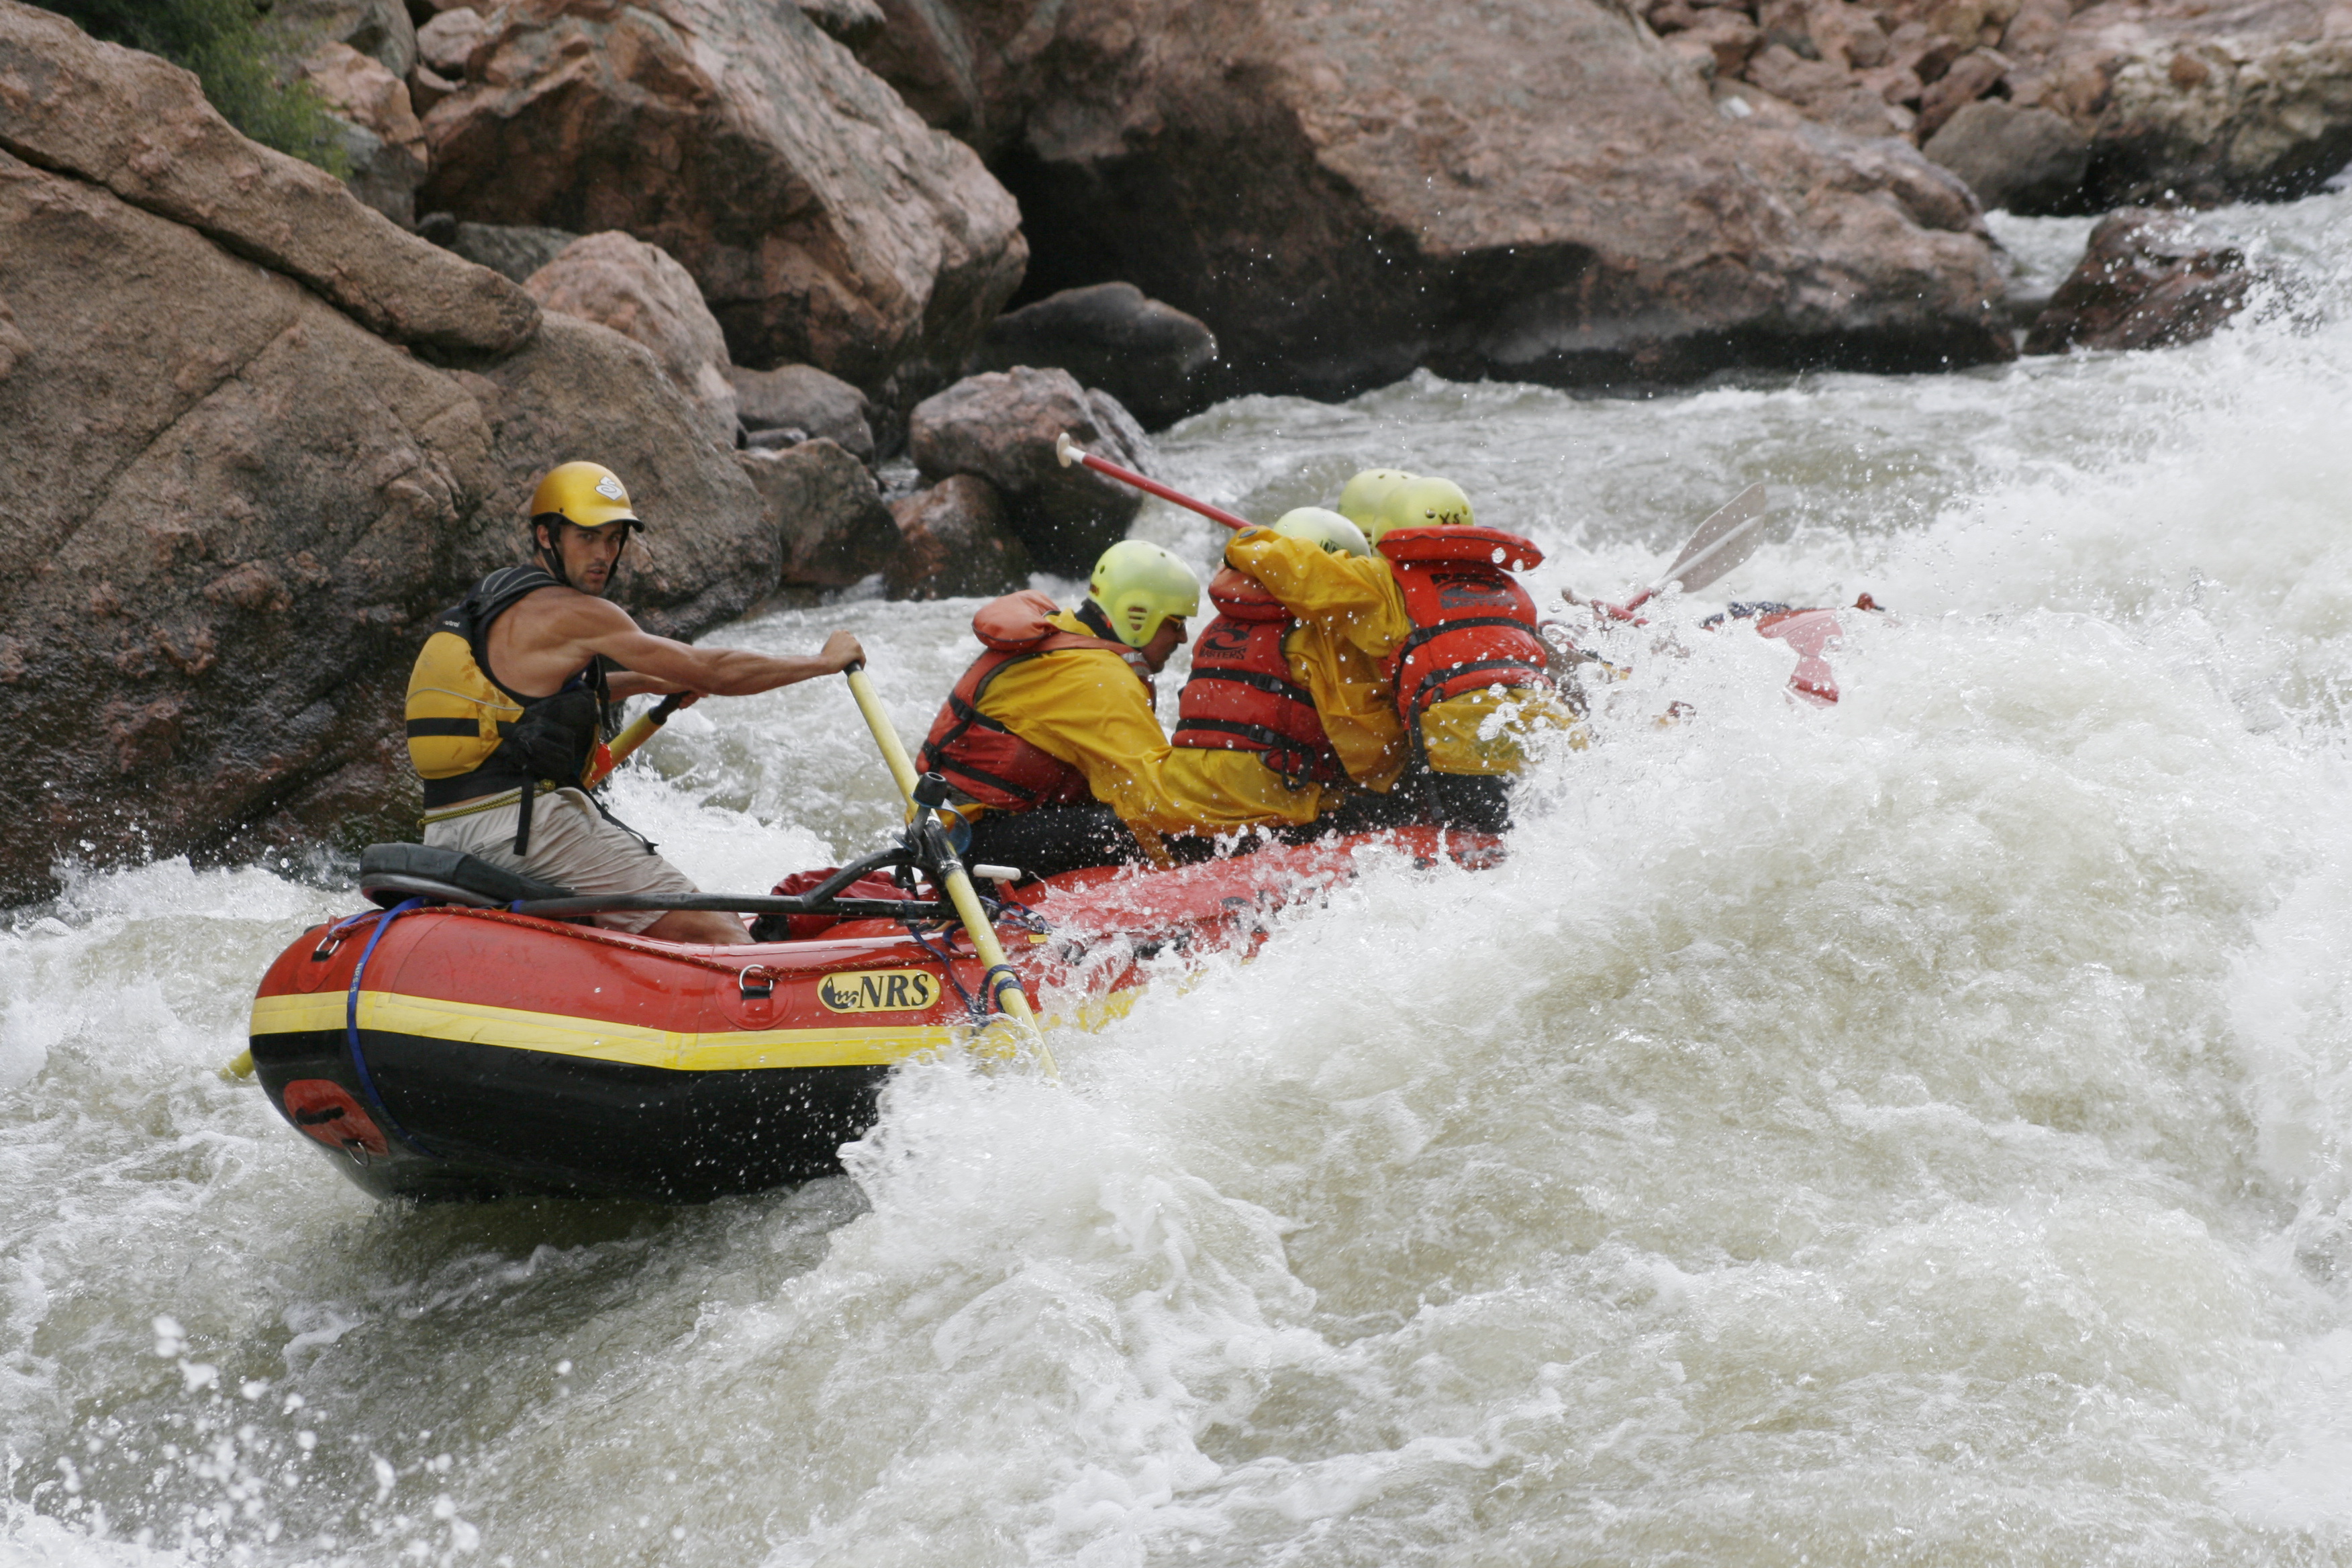
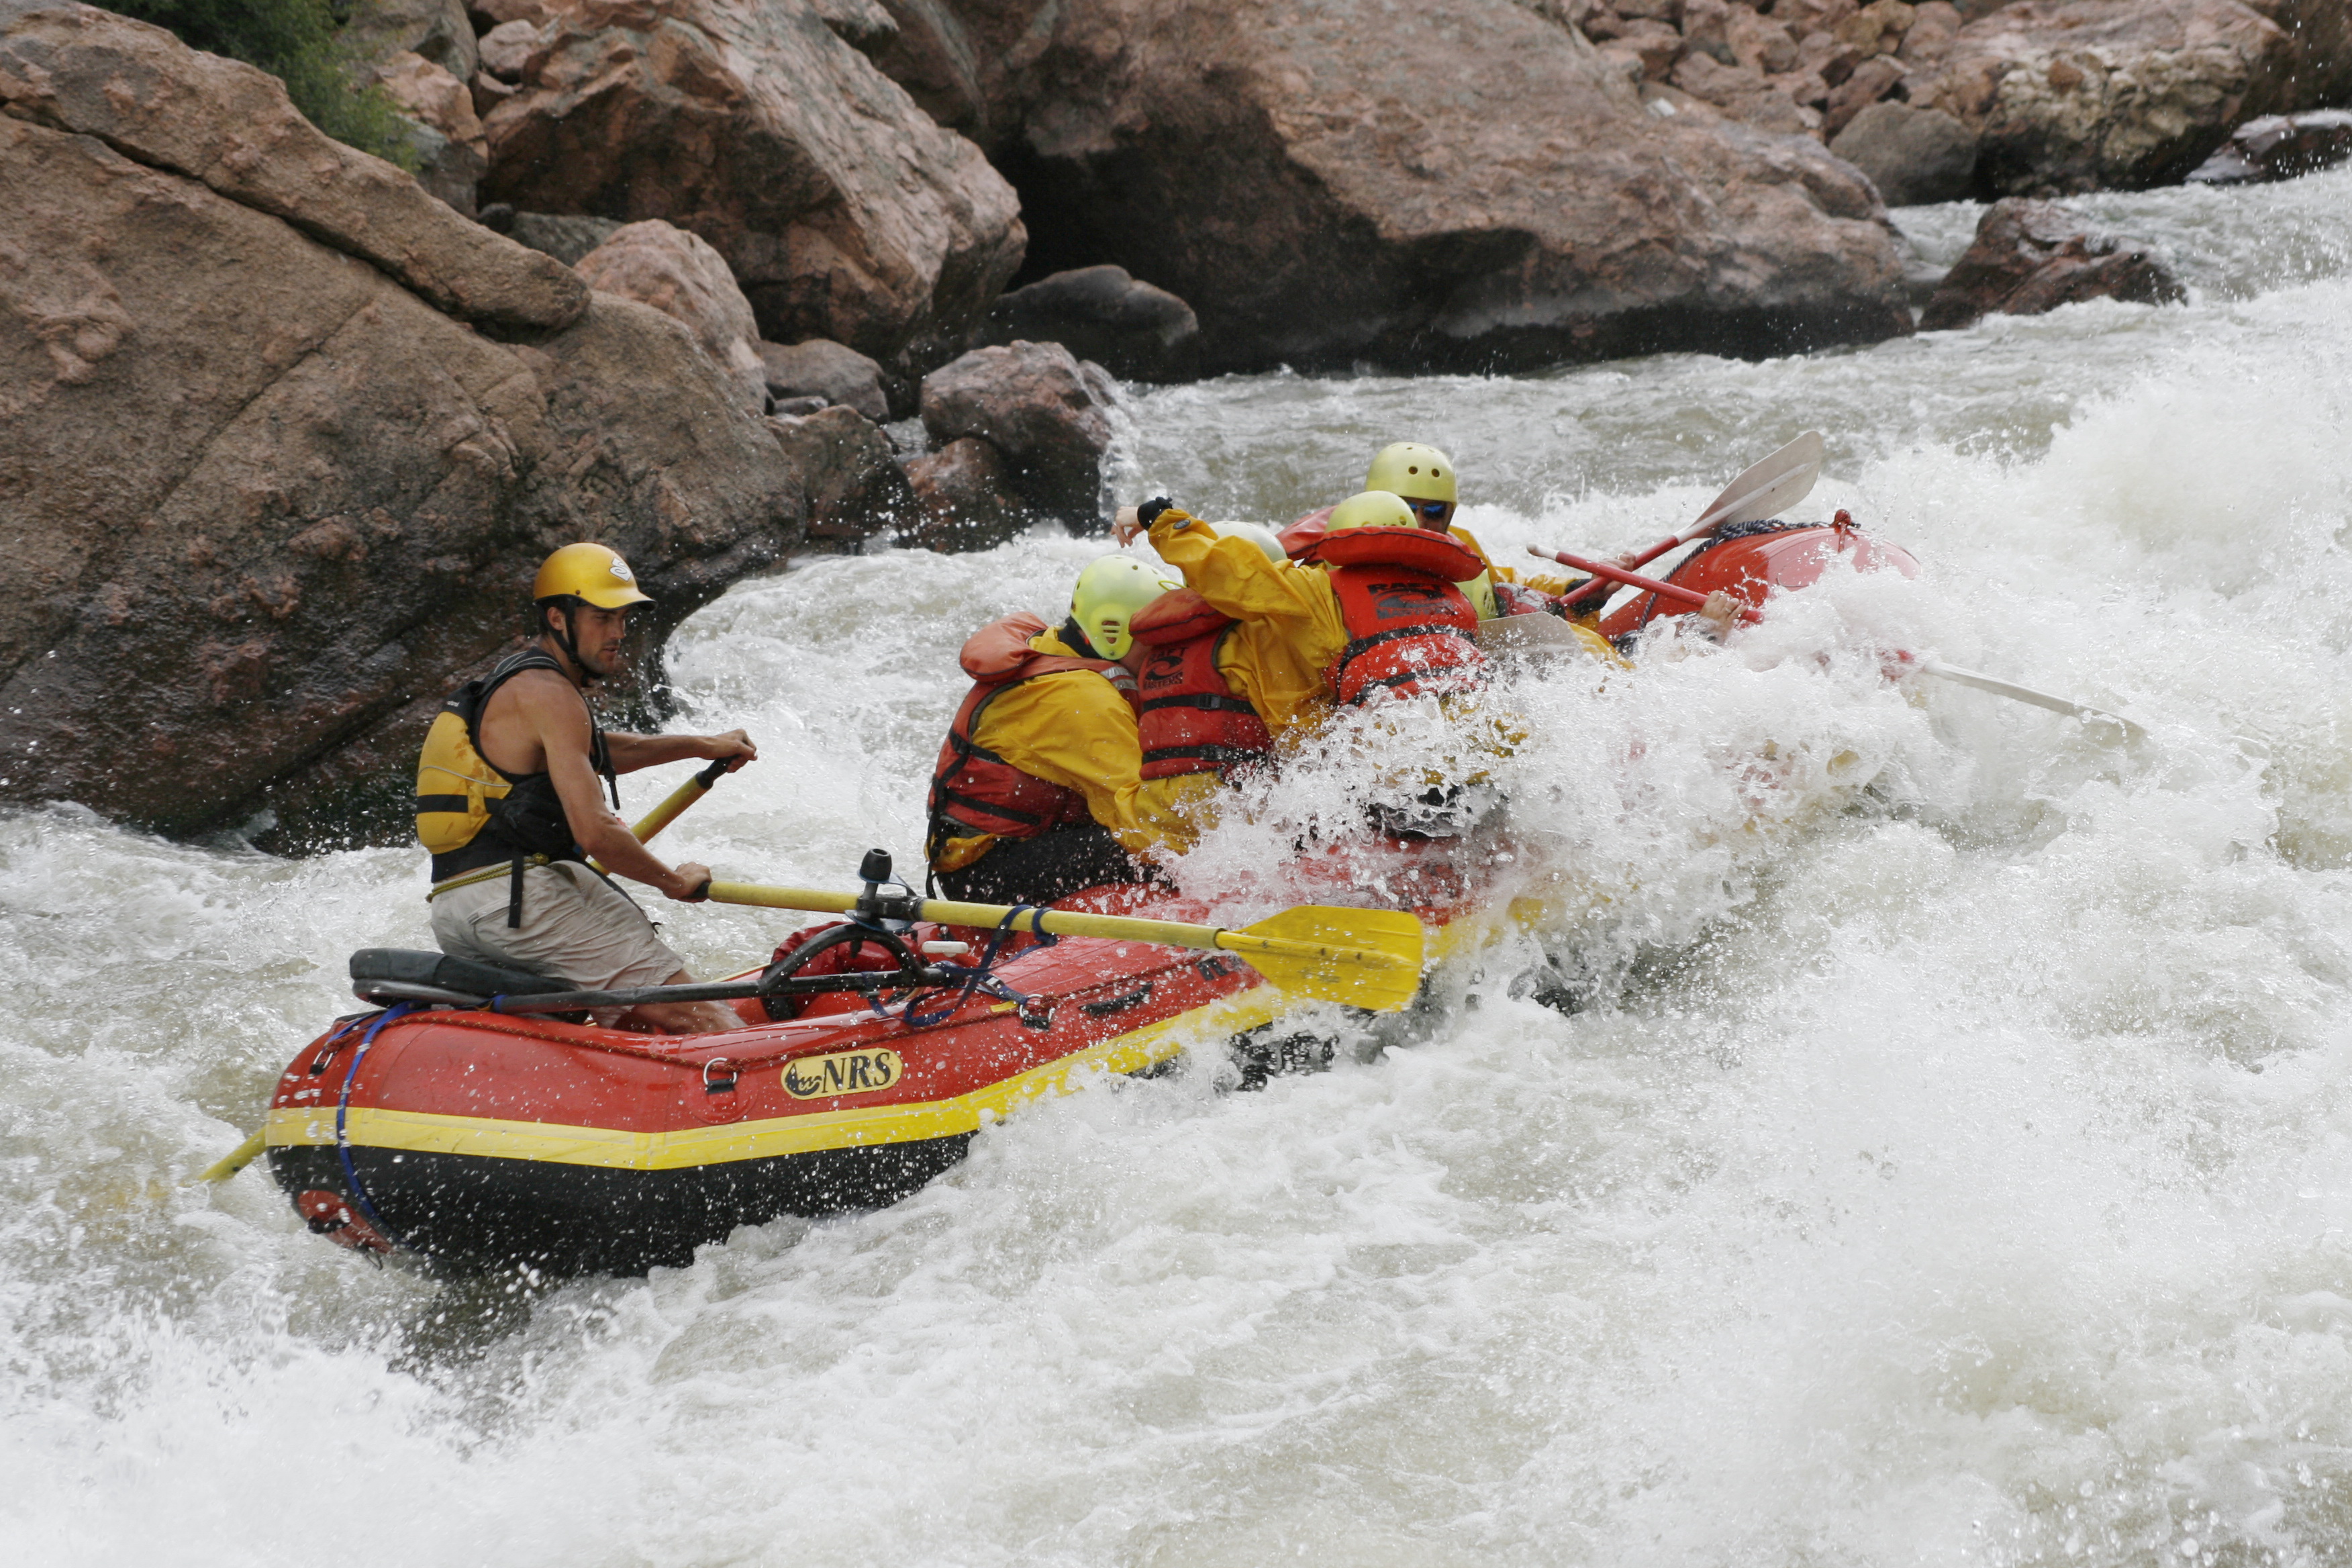
We arrived at our destination and got off the bus.  I cried, “I don’t want to go!  I am scared!  Do I have to?”  Everyone in my party reassured me that yes, indeed, I was going.  “As a matter of fact,” our   guide said, ” you can  get into this raft right here.” As I climbed in I searched for a place to hold on.    Imagine my surprise when I learned there are no hand holds in a white water raft!  The raft’s occupants hold themselves in place by jamming their feet under the sides and seats of the raft. Hands need to be free for gripping the oars.  AND, the guide told me,  if you are rowing, then you don’t even sit IN the raft, you sit on the EDGE of the raft.   Well there was no question about it, I was not going to row.  I was not going to sit on the edge of the raft.  I was sitting in the middle in the back.  “And you see this rope here?”  I said to the guide.  “This is what I am holding on to.  I  hope that’s okay, because that’s what I am going to do.”  My nephew and niece sat in the front of the raft, my husband and daughter sat on either side of me behind them.  Behind us sat the guide.

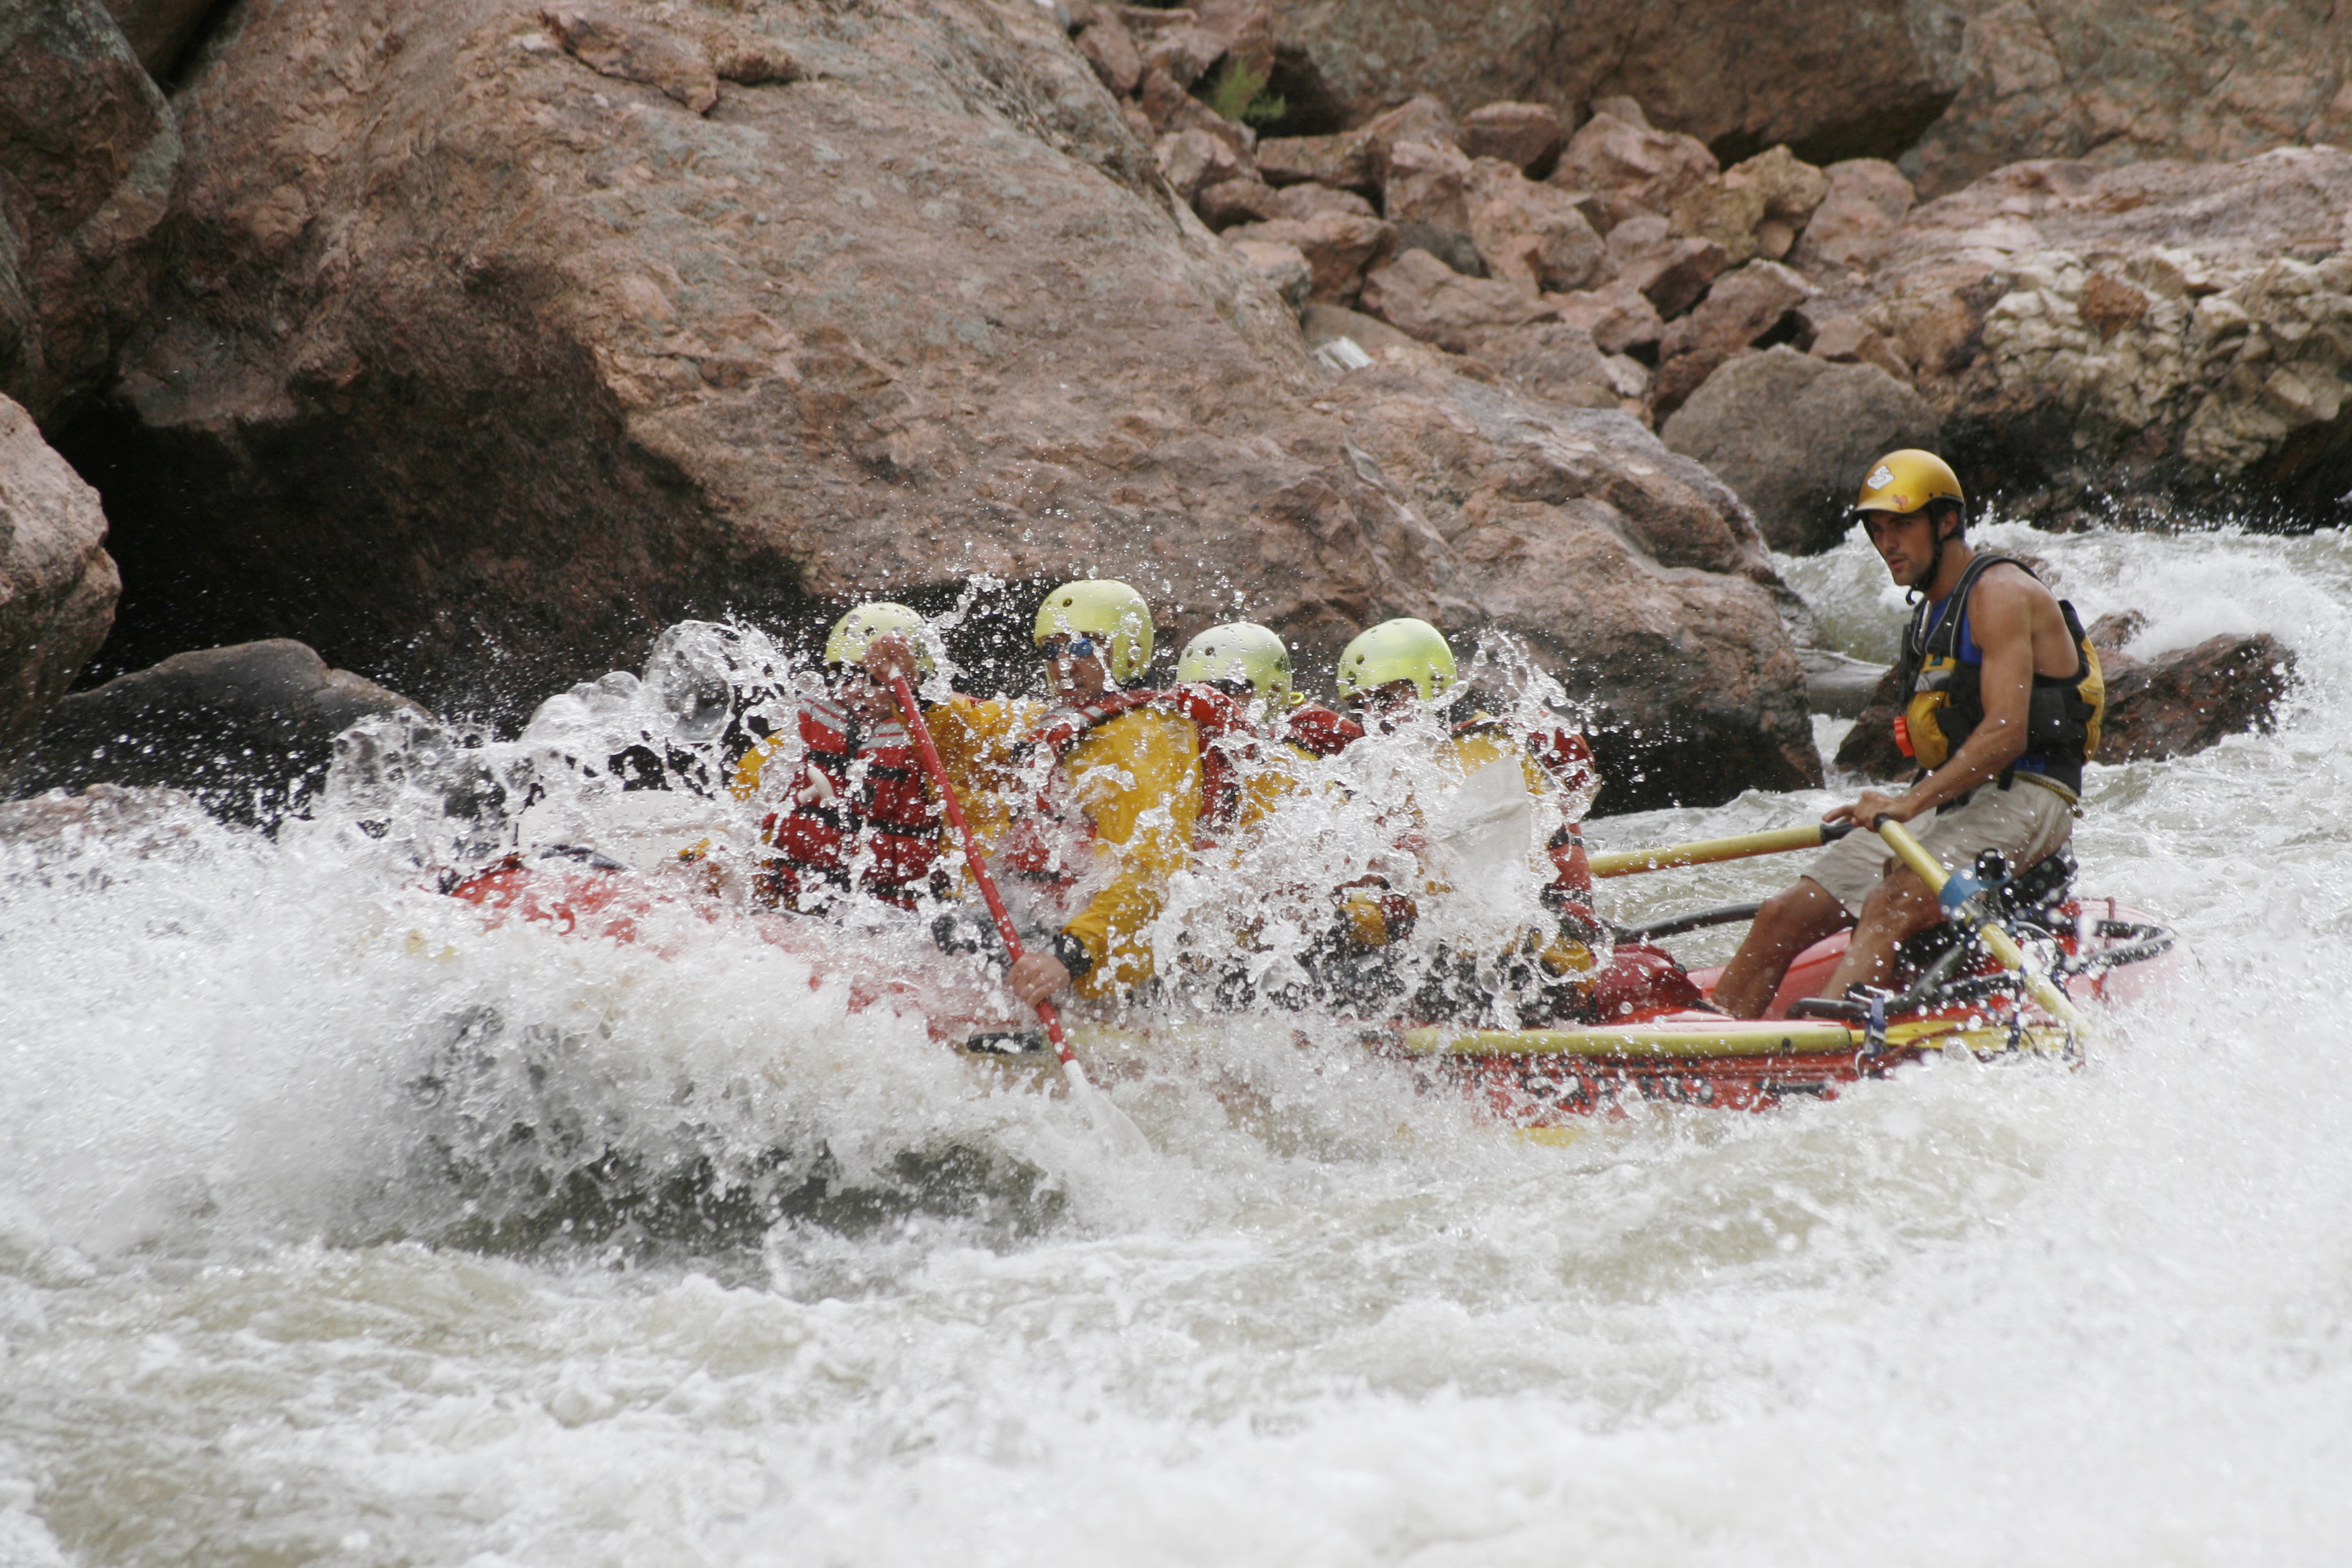
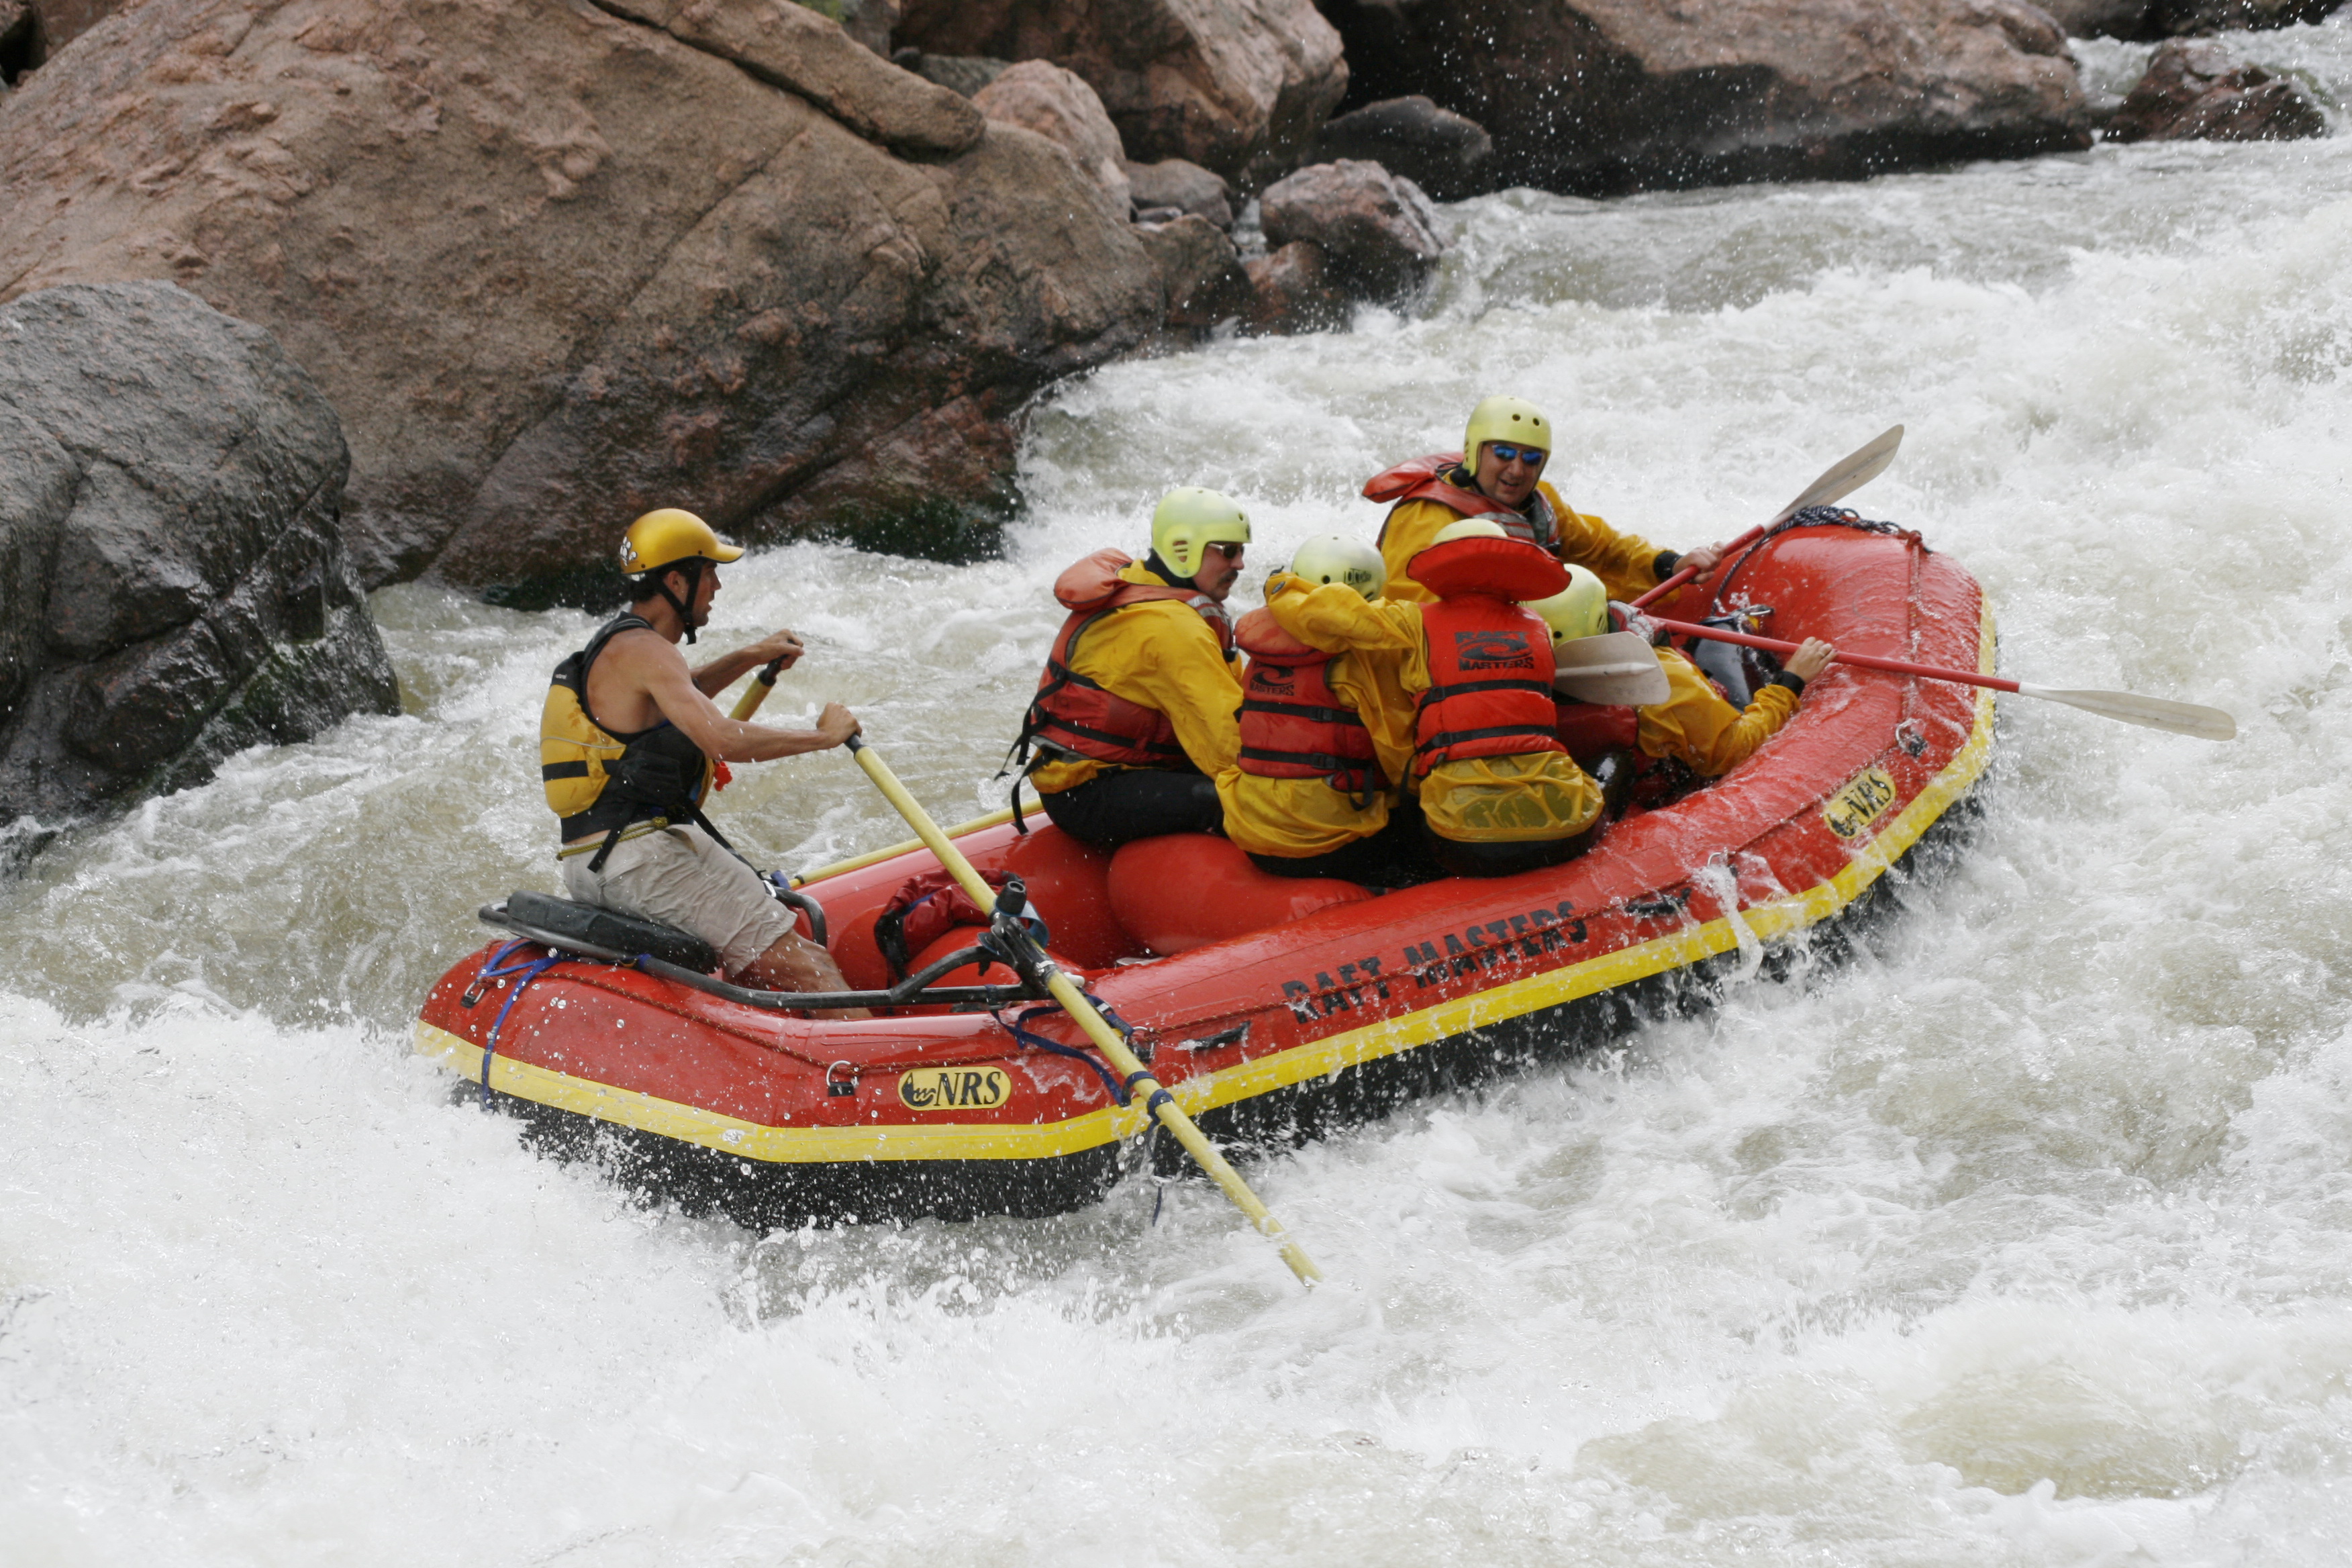
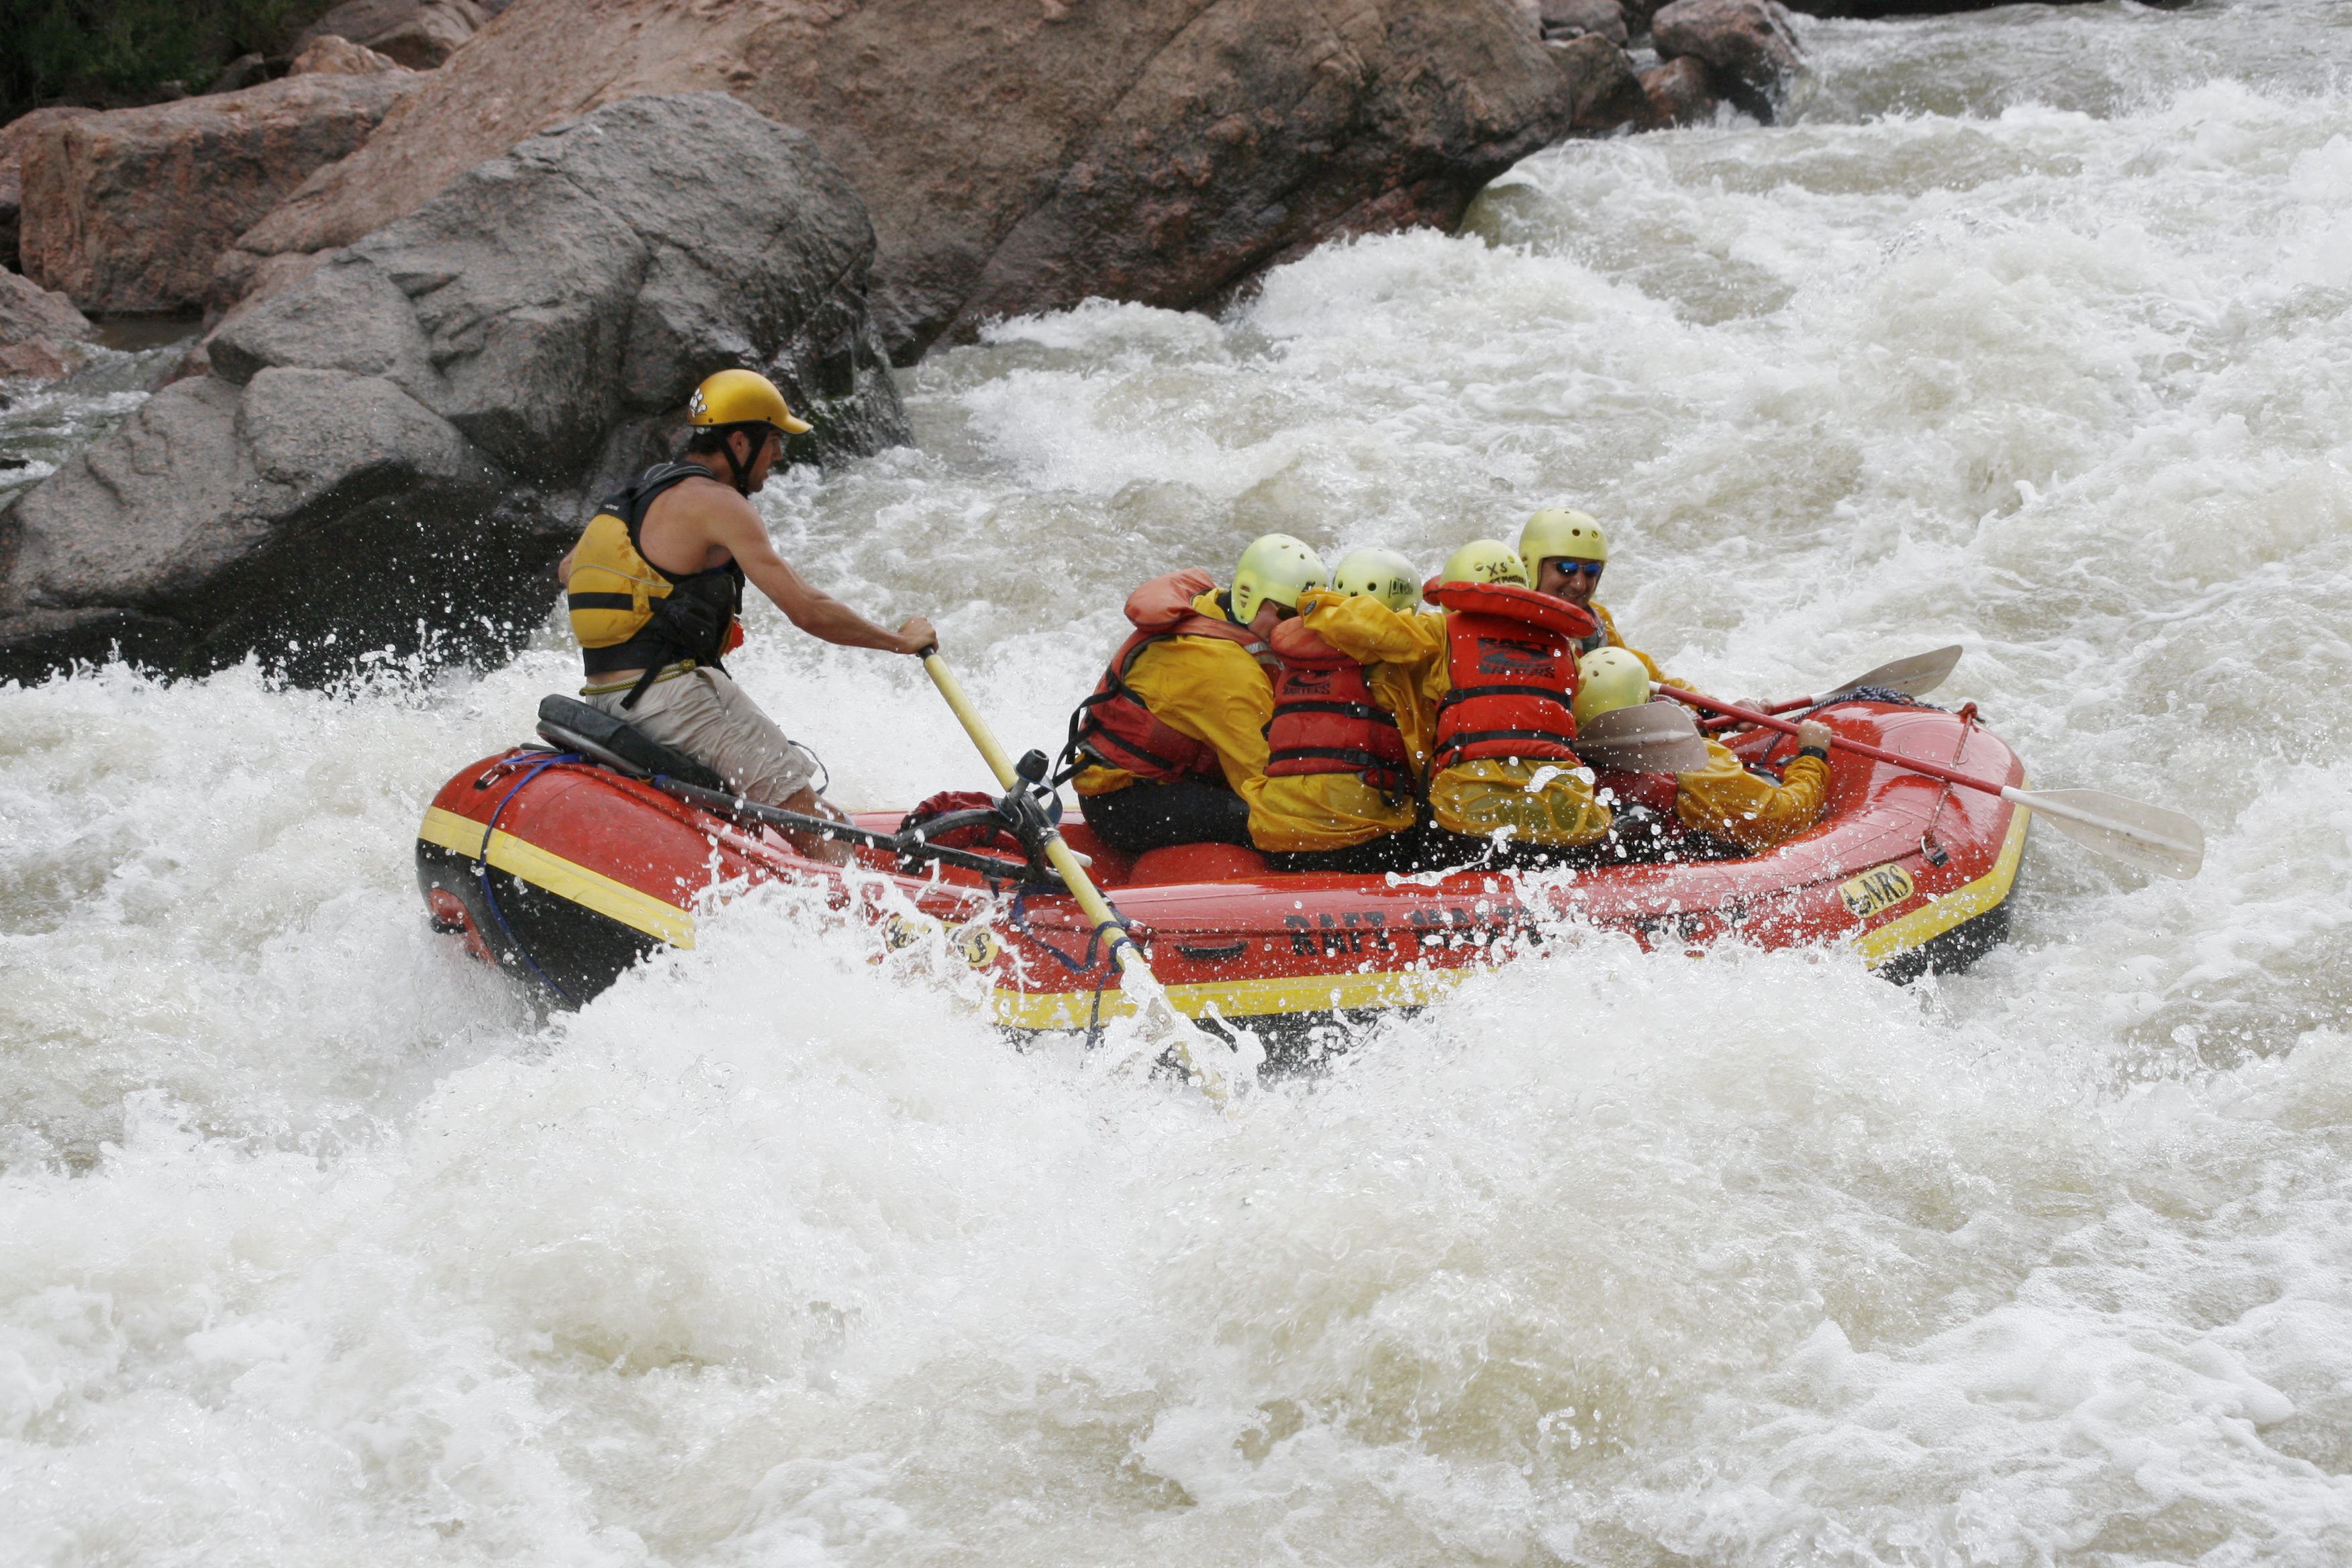
Water was extra high that day because we’d had a lot of rain and there was a lot of run off from the mountains..  We encountered class III and IV rapids that day.  In one word, the adventure was AWESOME!  No one fell overboard; although, we had a close call.  My daughter just about went in almost taking me with her.  As she began to fall, she put her arm around my neck.  Motherly instincts set in and I let go of the rope to grab for her. It was an excellent time.  The build up to the trip was more fearful than the trip.  But I will tell you what….. I will NEVER do THAT again!

Here is my card for today.  It is CASEd from the Annual Catalog.  Then there are a few photos from our rafting trip.

Perfect Pennants

Hope you enjoyed your visit here.  Until next time…

Happy Stamping!

Josie2

_MG_0026

_MG_0027

_MG_0028

_MG_0029

_MG_0030

_MG_0031

_MG_0032

_MG_0033


_MG_0034

_MG_0035

_MG_0036

_MG_0037

I Was a Stand-Up Comic

Today was housework day around here.  I was needing to vacuum and mop my kitchen floor for a while, but I had been putting it off because my husband had a batch of wine going and I wanted to wait until he spilled it everywhere while he was bottling before I mopped.  My mother would have had a conniption (is that a word?) if she would have seen it.  My mom’s floors are so clean you can eat off them.  You can eat off mine too…bread, Cheerios, anything that’s down there!  LOL!  That’s an original joke I wrote about one million years ago when I dabbled in amateur stand-up comedy.  Bet you didn’t think I could be so funny, did you?

Seriously, before I went back to school to become a teacher, I toyed around with stand-up comedy.  We have a comedy club locally that used to do Open Mike Night on Sunday evenings.  I used to go and practice my stand-up routine.  I opened a few shows for a few famous comics.  Can’t remember who they were right now.  I even did four shows in a Boulder comedy club.  I got paid $100.00 for doing them.  My hotel for the night was $150.00 so I didn’t make that much.  I did this while I was getting divorced from my first husband.   I felt it was cheaper than going to therapy.  🙂  Then I went back to school to get my teaching license, and for 17  years I had a captive audience every day!  There were times as a teacher that I felt like I WAS a stand up comic.  One thing my students always said about me was that I had an excellent sense of humor.  And I do!  I have other jokes, but don’t know if they would be appropriate here.  We’ll see.  Maybe in the future.

Anyway, my husband got his wine bottled last night, and I am glad I waited to clean.  While he was bottling, he managed to knock a full bottle over and it broke.  Wine went everywhere!  (What a waste of perfectly good wine!)  So, today was housework day.  I got the stickiness from the wine off the floor… along with a few Cheerios. 🙂  I even managed to do a few windows.

I am thinkin’ I am really liking this stamp set that’s called Endless Birthday Wishes.   This makes three or four cards in a row where I’ve used this set.  I’m liking the way this card turned out too.  I was going for a vintage look and I may have achieved it.  I like the subtle look of the pink against the tan.  What do you think?  Let me know.  I always appreciate comments.

Yippee Birthday - 1

Here’s another view so you can see how everything is layered.

Yippee Birthday - 2

Hope you enjoyed your visit here today.  Until next time…

Happy Stamping!

Josie2

P.S.  The chevron ribbon I used is reversible, and the lace trim is retired.  But, we do have some new lace trim that I will be ordering soon.  🙂

Endless Birthday Take 2

I love the color orange.  It comes in so many different shades, and it is very bright.  Bright colors always attract my eyes.  Bright orange is probably one of my favorite colors; a combination of red and yellow.  Not too many people can wear red, yellow or orange.  I am lucky that, depending on the shade, I can wear all three.  They are essentially, warm colors and I have a warm colored complexion being a natural auburn hair color.  I am sure you are thrilled that I shared that with you.  🙂  Hey, I am always looking for suggestions on things to write about.  If you have any, please feel free to make one.

Anyway, I like orange.  It’s bright, cheerful, and just the right color for a summer birthday.  The orange in this card is the new Tangelo Twist In Color.

Orange Endless Birthday Wishes

The card stock base for this card measures 4 1/4″ x 11″, and it is scored 2 1/2″ from either end when you place the long edge of the piece at the top of your scoring tool.    Here’s another view so you can see that everything is layered using stampin’ dimensionals.

Orange Endless Birthday - 1

The orange dots are stamped off once before stamping onto the white card stock.  Hope you enjoyed your visit here today.  If you are in the Colorado Springs area, I am offering an All Occasion Card Class on July 14, at 10:00 a.m.  If you are interested in attending, please email me.

Until next time…

Happy Stamping!

Josie2

Ooops!  I just realized my name is on each photo twice.  LOL!  Guess I was sleeping when I edited these.  🙂

Father’s Day Pop-Up Card FREE Tutorial

It is the end of week 2 of my retirement, and I am still enjoying my time off.  The weather has been excellent and I’ve been able to get out into the yard and get a lot accomplished.  On Wednesday, my 27-year-old son (my baby) came over and helped me trim a bunch of the trees in the back yard.  We have a few pines that are at “giant” status that I’d like to remove and plant with fruit trees, but my husband says NO!  I think pines are beautiful, but they make a mess of your yard.  The needles kill the grass.  But with them trimmed back, the yard is looking like a refuge and that is what I was going for.

For the lack of a better name, I am calling this a stand-up card.  You could also call it a pop-up card or whatever kind of card you want to call it.  I need to let you know that my friend Cathy designed the card.  We did one that was similar to this at one of her stamp clubs.  But the decorating on this card is mine…all mine!  🙂  LOL!  I must mention the name of the designer series paper is High Tide and it is no longer available as it retired with the expiration of this year’s Occasions Catalog.  🙁

Father's Day - 10

Here’s a photo tutorial for the card.

Step 1:  Prepare the base.  Using the same color card stock or different colors…it’s up to you, cut three pieces measuring 4 ¼” x 5 ½”, 2 ½” x 4”, and 2 ½” x 4 ¼”.  See photo below.

Father's Day-1

Step 2:  Place the 2 ½” x 4 ¼” piece of card stock on your scoring tool with the long edge across the top.  Score it at  ¼” and again at 2 ½.  You can see the score lines in the above photo.

Step 3:  Cut two pieces of Designer Series Paper.  Cut one piece 4” x 5 ¼” and the other 2 ¼” x 3 ¾”.  See the next photo.

Father's Day - 2

Step 4:  Add a piece of sticky strip along the ¼” score line on the 2 ½” x 4 ¼” piece.

Father's Day - 3

Step 5:  Remove the backing from the sticky strip and attach it to the 4 ¼” x 5 ½” piece of card stock as shown in the photo below.

Father's Day - 4

Step 6:  Orient these two pieces of card stock so the 2 ½” x 4 ¼” piece is at the top of your work surface and begin attaching the Designer Series Paper (DSP).  First, attach the 4” x 5 ¼” piece of DSP to the card base so it covers where you just attached the 2 ½” x 4 ¼” piece.  (See the next photo.)

Father's Day - 5

Step 7:  Flip the card over and place a piece of sticky strip along the score line of the 2 ½” x 4 ¼” piece of card stock.  Place a second piece of sticky strip close to the edge.  (See photo.)

Father's Day - 6

Step 8:  Flip the card stock over again so that the smaller piece is at the top.  Fold it down and remove the backing from the sticky strip.

Father's Day -7

Step 9:  Adhere the 2 ¼” x 3 ¾” piece of DSP to the 2 ½” x 4” card stock base.  Attach this piece to the 2 ½” x 4 ¼” piece of card stock.  When it is attached correctly, it will look like this.

Father's Day -8

Step 10:  Decorate!

Father's Day -9

If you would like FREE printable version of this tutorial just click here.

Hope you enjoyed your visit here today.  Until next time…

Happy Stamping!

Josie2