Monday, June 4, 2018
Yes! I’ve been absent for quite a while and I am so glad that I’ve had the chance to stamp this past weekend and create something that I’ve been wanting to do for a long time.
My husband and I went home to Ohio and Pennsylvania to visit our families for the last week of April and the first week of May, and I’ve been going non stop ever since we got back into town on May 8th. I’ve been babysitting my grand-daughter at least once each week since we got back; sometimes twice. Each session includes a trip to Denver to pick her up on Sunday afternoon, an overnight as my daughter works nights, (she’s an RN and her boyfriend moved to Virginia Beach to start his new job at the end of April). Sometimes it also includes a trip back up to Denver to return her to her mother on Monday. The last few weeks, my daughter has been coming down to get her and then staying for a few days. Getting in some of that last-minute mother/daughter/granddaughter time before they move at the end of June! We forget quickly what it is like to get up at night with a baby and how much work it really is. That is why we have our children while we are young! I finally got her to sleep for the night and thought I’d spend some time on this blog post. I probably won’t get it finished until tomorrow as I still need to photograph the project I created. For the lack of a better name for this, I’m calling it my Mason Jar Paper Flower Terrarium. I’m providing a brief written tutorial at the end of the post.
I wish I could claim this idea as my own, but I can’t . I received one of these as a gift a few years ago from a friend and fellow demonstrator; Amanda Waugh. I thought it was one of the neatest things I’d ever seen, so I decided to try my hand at making one of my own. The one that Amanda gave me is the purple. I love it and I love the colors. Unfortunately all of the colors she used and the dies she used to cut out the flowers have retired, so when I started working on mine, I had to improvise a little. I think my terrarium turned out pretty well. I have to admit, there were times during the process when I wasn’t sure what I would end up with, but I’m pretty pleased with how it turned out.
Tuesday, June 5, 2018
Okay, so my daughter and grand-daughter have just left for home and I miss them already. I probably won’t see them for two weeks because they are headed out on vacation on Monday. Once they get back from vacation they will be packing up their home and will be on their way to Virginia by the end of the month. What am I going to do without my grand-daughter near by? Or my daughter, for that matter. 🙁
I’ve finally photographed my project!


Isn’t it cute?!
Here are photos of the one my friend Amanda made. She used a pint-sized wide mouth Mason jar instead of the quart-sized like mine. I love the colors she chose for hers! Purple is one of my favorite colors and I think I’m going to have to make a purple one next with some of the new purple shades Stampin’ Up! has.


I don’t believe Amanda used a styrofoam cone to build her flowers up. It looks like she managed to crumple up paper and attach it to the jar lid. I didn’t want to pull it apart to find out. I love the one she made as much as mine…I think more.
I’m also including a photo of the sticky moss that I used to cover the styrofoam cone just so you know what it looks like. In the list of supplies I specifically included a pair of “old” scissors which you will use to cut the sticky moss. The scissors will get glue on them, that’s why I suggested “old” ones.
Here is the moss! 🙂

Well I hope you enjoyed your visit today. Hopefully it won’t be so long between this post and my next one. Until next time…
Happy Stamping!

SUPPLIES:
- Wide mouth Mason Jar with lid and ring
- 6” Styrofoam cone
- Mossy Mat Peen ‘n Stick Moss
- Marker
- Old pair of scissors (They will get gooey when you cut the Mossy Mat.)
- Multipurpose liquid glue
- Glitter Enamel Dots
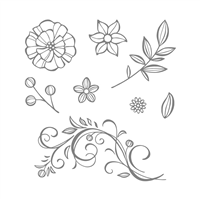
- Falling Flowers Stamp Set
- Card Stock
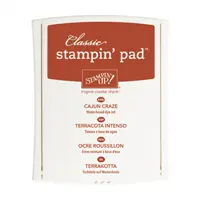
- Cajon Craze
- Crushed Curry
- Old Olive
- Ink
- Cajon Craze
- Crushed Curry
- 5/8” burlap ribbon
- Tear & Tape
- Glue Dots
- Dimensionals
- Stamping Sponges
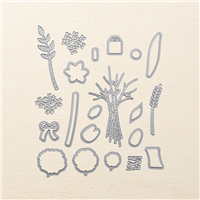
- Bouquet Bunch Framelits
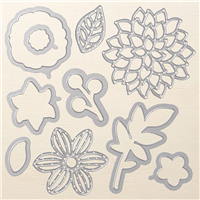
- May Flowers Framelits
- Big Shot
ASSEMBLY:
- Cut off approximately 1” from the wide end of the Styrofoam cone. I used a cutting board and serrated kitchen knife.
- Cover the cone with a piece of the Peel ‘n Stick Mossy Mat.
- Trace a circle the size of the jar lid on a small piece of the Peel ‘n Stick Mossy Mat and cut it out. Attach it to the inside of the jar lid.
- Glue the base of the moss-covered cone to the moss-covered side of the jar lid and set it into the ring using the Multi-Purpose Liquid Glue
- Stamp flowers with the Falling Flowers Stamp Set and cut them out with the May Flowers Framelits. I cut eight each large and small flowers out of Crushed Curry and seven each of the large and small flowers out of Cajon Craze. I also cut several flower bunches out of each color using the dies from the Bouquet Bunch Framelits. Sponge around the edges in their coordinating color ink.
- Layer flowers, one small over one large, using a dimensional.
- Attach to moss-covered cone with Multipurpose Glue in random order.
- Add a Glitter enamel Dot to the center of each flower.
- Fill in spaces between the large flowers with the smaller ones.
- Cut five leaf branches using the smaller die from Bouquet Bunch Framelits out of Old Olive card stock and place randomly into the flowers.
- Carefully insert decorated cone into jar and screw lid tight. Since you glued a piece of moss to the lid, it will not tighten down completely
- Cut a piece of burlap ribbon to fit around the jar ring. Attach it with a piece of Tear & Tape.
- Tie a bow with a piece of ribbon and attach it with glue dots.


beautiful!
Let’s get inky,
Karen
Karen Z Browning Stamp with Me KZB stampwithmekzb@gmail.com 770-403-1182
Thank you!