Hi Stampers!
Looks like I am just going to make my June post by a few hours! This is my last month to share the cards I created for Splitcoast Stampers the second half of last year. The theme for last December for the Dirty Dozen Design Team was Wintergreen. We were supposed to make winter themed cards using green as the main color. We were asked to depict images of pine threes or other evergreens and our key word was “Firs”.
Here is what I created:
Wintergreen Sympathy

This card meets all of the requirements of the challenge put forth this month. I colored the pearls with Mossy Meadow Stampin’ Blends, Also, after I stamped the trees full strength, I stamped again as if I was stamping off. Several retired products are used in this card.
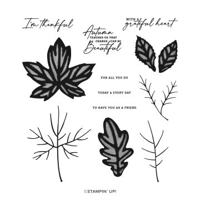
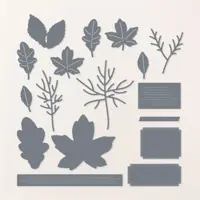
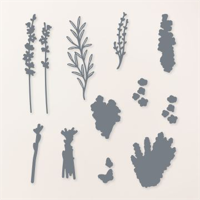
Stamps: Encircled in Nature, Wild Ferns
Paper: Mossy Meadow, Old Olive, Basic White
Ink: Mossy Meadow
Accessories: Encircled in Nature and Wild Ferns Dies, Iridescent Pearls Basic Jewels, Mossy Meadow Stampin’ Blends
Techniques: Stamp-off
Unconventional Evergreen Trees

Another wintergreen card made using circles cut from the Deckled Circle Dies. I used the largest circle from the dies and cut it in half. Then I golded it three times sto create the trees If you want to know exactly how to make these threes, you can find an older version on my blog at:
https://fancyforstampin.com/2013/11/…card-tutorial/ as this is a remake of the same tree that I did on November 24, 2013
Stamps: Greetings from the Season
Paper: Basic White, Early Espresso, shaded Spruce, Classic Christmas 6 x 6 DSP (Retired)
Ink: Shaded Spruce
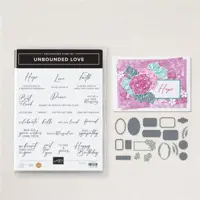
Accessories: Winter Snow Embossing Folder, Unbounded Love and Deckled Circle Dies (Retired)
A Winter Sympathy

I used blending brushes to create the background for the white heat embossed trees on this winter card that includes, “evergreen” trees. I know! No green.
Stamps: Forever Forest and Quiet Reflection
Paper: Basic Black and Basic White
Ink: Gorgeous Grape, Boho Blue, Blueberry Bushel, Basic Black & Versa Mark
Accessories: Frosted Forest Dies, Blending Brushes, White Embossing Powder, heat too. 1-3/4″ circle punch
Techniques: Heat embossing.
Winter Sled

Nothing says winter more than a vintage sled! This reminds me of the one I had as a child…the one that is till hanging in my garage that my children used as well. This card brings back a lot of good winter memories!
Stamps: Sophisticated Sled
Paper: Cherry Cobbler, Basic White, Crumb Cake, and Joy of Christmas DSP (Retired).
Ink: Memento Tuxedo Black
Accessories: Sophisticated Sled Dies, Cherry Cobbler and Old Olive Stampin’ Blends
Winter Wreath

Using the branch dies from both the Encircled in Nature and Sparkle of the Season Dies (retired), I cut enough to create an evergreen wreath. I created berries by using a small hole punch and cherry cobbler card stock. I attached the berries with liquid glue. I colored some adhesive backed pearls with a cherry cobbler Stampin’ Blend and attached.
Stamps: Snowy Wonder
Paper: Cherry Cobbler, Mossy Meadow, Basic White, and Gold Foil
Ink: cherry Cobbler and Mossy Meadow
Accessories: Encircled in Nature Dies, Deckled Rectangle Dies, Sparkle of the Season Dies (retired), gold ribbon.
Snowman Shaker Card

For this wintergreen card, I decided to make a shaker snow globe using the dies that come with the Snowy Wonder Bundle. This one is my favorite because I really like snowmen. I’ve even managed to collect a few that have been added to my Christmas decorations. They are cute! I keep them up in my house all winter long, inside and oout. Unfortunately, I added a bit too much adhesive to the back of the DSP in order to attach the window sheet and I ended up attaching some of my sequins too. They are stuck to the side of the snow globe! But, this card is my favorite anyway. the main color is green, and it is definitely a winter card.
Stamps: Snow Wonder
Paper: Snow Scenes DSP, Garden Green, Window Sheets
Ink: Garden Green
Accessories: Snowy Wonder Dies, silver sequins.
Well that’s all I have today. Hopefully I’ll have some more up-to-date creations to show you next month. June just seemed to fly by! I don’t know where the month went!
Until next time…
Happy Stamping!


You must be logged in to post a comment.